How to Install Anypoint Studio on Windows
Are you facing challenges in Installing Anypoint Studio on Windows? You have landed in the perfect place. This guide introduces you to Anypoint Studio, and its features and walks you through a simple installation process on your Windows system. Once you finish the article, you will have Anypoint Studio running on your System to accelerate your Integration and API Development Tasks.
- Dell Boomi vs MuleSoft
- Mulesoft Interview Question And Answers
- Introduction to the MuleSoft Anypoint
- Mulesoft Tutorial
- Mulesoft vs Zapier - Key Difference
- Mulesoft vs WebMethods - Key Difference
- Mulesoft vs Alteryx - Key Difference
- What is Mulesoft? - A Complete Beginners Tutorial
- Mulesoft vs Informatica - What's The Difference?
- Mulesoft Architecture
- MuleSoft API Led Connectivity
- MuleSoft vs TIBCO - The Key Differences
- Mulesoft Connectors
- What is MuleSoft Developer?
- Mulesoft Integration with Salesforce
In modern Software applications, building and Testing APIs along with the integration tasks is no longer optional. They have become a necessity. Anypoint Studio is a robust integrated development environment (IDE) that simplifies these tasks. Anypoint Studio provides an intuitive interface to streamline your projects for a beginner as well as an experienced API Developer. This guide will help you install Anypoint Studio on your Windows Platform so that you can efficiently design and test your Mule Applications.
Table of Contents
- What is Anypoint Studio
- Features of Anypoint Studio
- System Requirements
- Prerequisites for Installation
- Steps to Install Anypoint Studio on Windows
- Frequently Asked Questions
What is Anypoint Studio?
Anypoint Studio is a powerful and versatile IDE designed for building and managing Mule applications. In general, Mule Applications is a set of configurations and components built using Mule runtime, which is the core runtime engine of MuleSoft. They are constructed using are Mule ESB (Enterprise Service Bus).
For creating and managing these applications, MuleSoft developed Anypoint Studio to create Mule applications and APIs as part of its MuleSoft Anypoint Platform. Anypoint Studio is built on the open-source Eclipse platform. It has a user-friendly drag-and-drop design environment to Efficiently create, design, and manage APIs, connectors, and integrations.
But before we install the Anypoint Studio in our system, let us have a close look at its features.
| If you want to enrich your career and become a professional in MuleSoft, then visit Mindmajix - a global online training platform: "MuleSoft Certification course" This course will help you to achieve excellence in this domain. |
Features of Anypoint Studio
It includes a graphical interface for designing API specifications and transformations and a testing environment using which you can validate integrations, and ensure seamless connectivity with various systems and data sources.
Developers can immediately observe how data is transformed, routed, and processed within the integration flow using Real-Time Testing.
Anypoint Platform has Anypoint Exchange which is a comprehensive repository that provides developers with a vast collection of pre-built templates, connectors, examples, and other reusable assets.
It also allows us an easy integration with the Anypoint Platform for complete API management. It simplifies the development and deployment of APIs and applications using built-in support for the Anypoint Platform.


System Requirments
To install any Software framework or tool, there is a minimum set of requirements that our system should fulfill to use the tool. For Anypoint Studio too, there are some minimum requirements for the system which are specified in the official documentation of Anypoint Studio. They are as follows:
- A minimum of 4GB of free RAM.
- CPU Processor of 2GHz
- 10GB free hard drive space
- Windows 10 or Windows 11
As the application grows larger and more complex, these should be upgraded to ensure a smooth workflow of Mule Applications.
Related Article: Introduction to the MuleSoft Anypoint
Prerequisites for Installation
Before installing Mule, you have to install a supported version of Java on your system. In the official documentation, JDK 8 is recommended to install and configure. First, you have to create an Oracle Account at https://profile.oracle.com/myprofile/account/create-account.jspx. Then, Follow the below steps to install JDK on your windows before installing the Anypoint Studio.
Step 1: Visit the official site https://www.oracle.com/java/technologies/downloads/#java8 and click on the ‘Windows’ option as shown below:


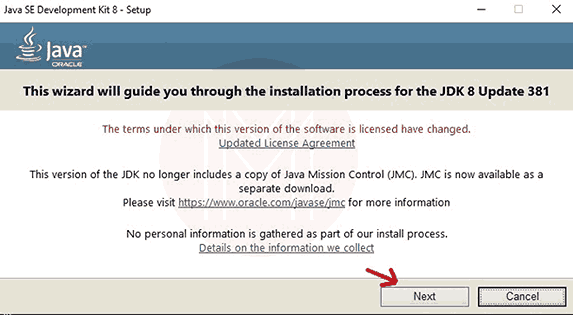
Step 2: Navigate to the folder where the setup file has been downloaded. Double-click on the setup file to run the installer. The installation wizard will appear as shown below. Click on the next option to continue.

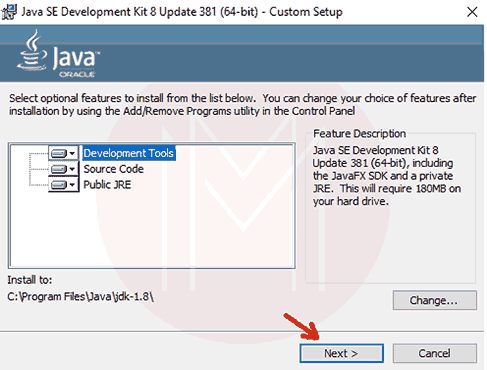
Step 3: After this, select the ‘Development Tools’ option and click on the next button.

Step 4: Installation of Java 8 should begin as shown below:

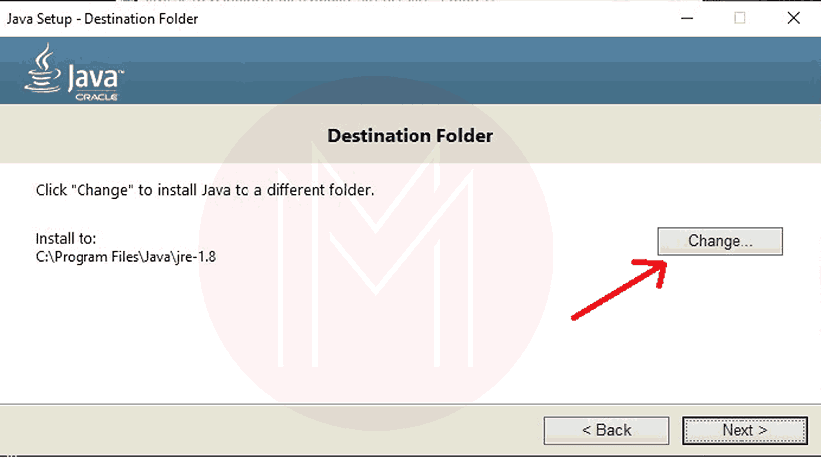
Step 5: After this, select the destination folder where you want to install JDK 8 and click on the next button to continue.

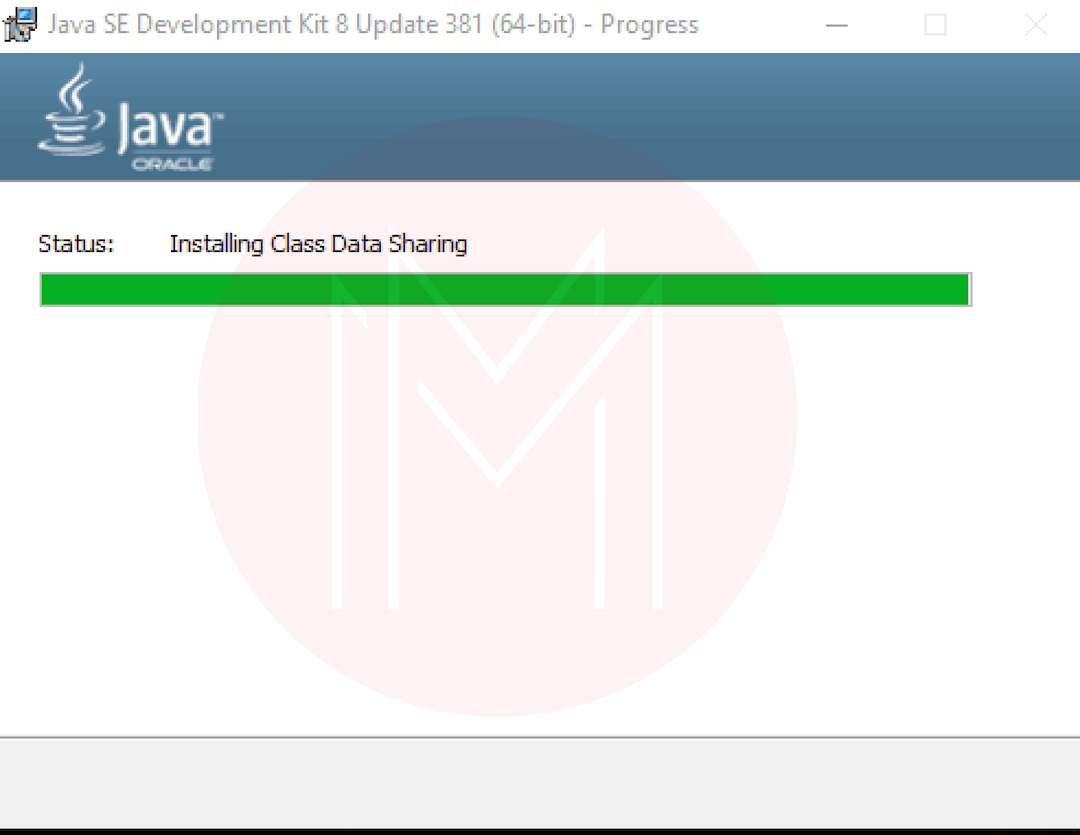
Step 6: Then, the installation of Java starts, and the status appears as shown below:


Step 7: After the complete installation close the installer setup as outlined below:


Step 8: After the JDK 8 installation is done, you have to configure the environment variables. First, navigate to the bin folder of the JDK-installed files and copy its path as shown below:


Step 9: In the start menu, type environment, and click Edit system environment variables. The System Properties window will open. Click on the Environment button as mentioned below.


Step 10: Now, Select Path in the System Variables section. Click ‘Edit’ after selecting the path as demonstrated below.

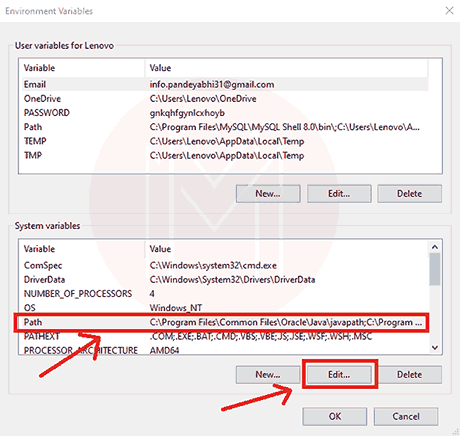
Step 11: After this, click the ‘New’ option paste the address of the bin folder as shown below, and click on the ‘OK’ button.


Steps to Install Anypoint Studio on Windows
After the JDK has been installed and configured correctly on our system, let us proceed with the installation of the Anypoint Studio.
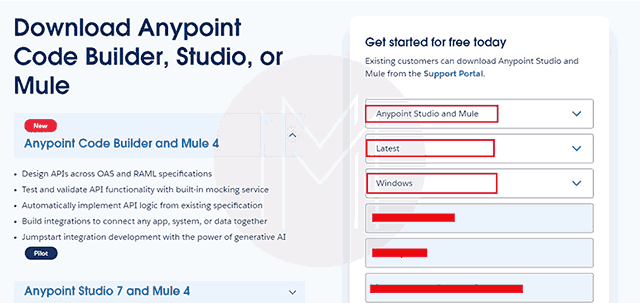
Step 1: Visit the official site of MuleSoft. Select the product Anypoint Studio and Mule and Windows Platform as shown below:

Step 2: Scroll down and fill in the remaining details a phone number and Company details. In company details, you can fill in NA. Then select the country option and then click on the Download button as outlined below:


Step 3: After this, a confirmation pop-up appears as depicted below. It asks you to check the email message which contains the download link.


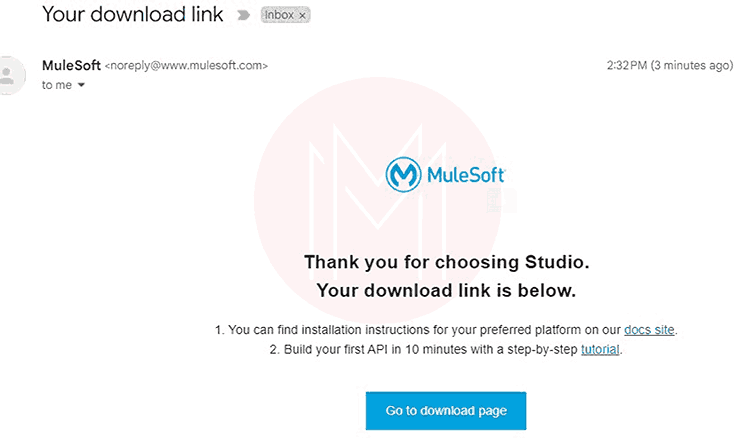
Step 4: Open the Gmail inbox. You should get an email message containing the download link for Anypoint Studio as demonstrated below. Click on the ‘Go to download page’ button.

Step 5: After clicking on the ‘Go to download page’ button, you will be redirected to the download page which appears as shown below. Click on the ‘Download’ button. A zip folder containing the bundled components will be downloaded.


Step 6: Navigate to the directory where the folder has been downloaded. Extract the files as mentioned below:


Step 7: Now, navigate to the extracted folder and launch the Anypoint Studio by double-clicking on the application file as shown below:


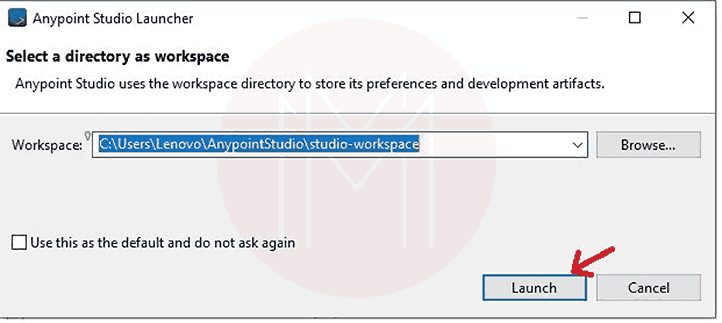
Step 8: After launching the application file, you will get a pop-up asking you to choose the folder as your workspace as shown below. After choosing the workspace, click on the launch option as shown below:

Step 9: The Anypoint Studio will start launching as shown below:


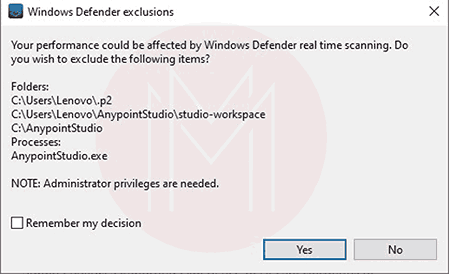
Step 10: The Windows Defender might ask your permission to exclude the Anypoint Studio to exclude it from the scanning as depicted below. Click on the ‘Yes’ option to continue.

Step 11: After this, a Firewall pop-up should appear asking you to allow Anypoint Studio to access your network as illustrated below:


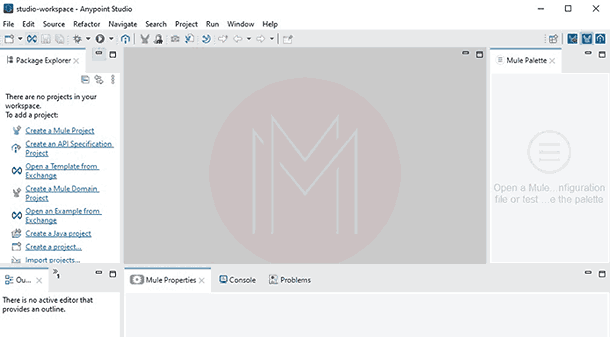
Step 12: Once you give all the permissions, the Anypoint Studio interface should appear as shown below:

Frequently Asked Questions
1. How to import existing Mule projects into Anypoint Studio?
Inside Anypoint Studio, select the Import option and select the project type or configuration files of the Mule projects that you want to import.
2. Is Anypoint Studio available operating systems?
You can install it on different platforms, including Windows, macOS, and Linux. You need to choose the appropriate OS while downloading the installer.
3. Can Anypoint Studio be used with other IDEs on Windows?
Yes, there is no problem if you have other integrated development environments (IDEs) on your Windows system. Anypoint Studio operates as a separate application, without any conflicts.
4. How to use Anypoint Studio for non-Mule applications?
You can use Anypint Studio for Non-Mule Applications utilizing the Anypoint MQ REST APIs to send and receive messages. Visit the official documentation for complete information about the configuration and setup.
5. Is Anypoint Studio free or paid?
Anypoint Studio is available in both free and paid versions. The free version is the Community Edition which has basic features. On the other hand, the paid Enterprise Edition comes with extra functionalities to meet enterprise requirements.
Conclusion
Anypoint Studio is one of the popular choices of developers to build Integration-based software and APIs. It helps us to simplify the data connectivity and use pre-built connectors and real-time testing tools. Anypoint Exchange provides pre-configured templates and connectors, saving developers time and accelerating the development process. In this guide, you have gained all the information about the Anypoint Installation. Now, you are ready to explore the Integrations and API Development with Anypoint Studio.

.svg&w=750&q=75)
Stay updated with our newsletter, packed with Tutorials, Interview Questions, How-to's, Tips & Tricks, Latest Trends & Updates, and more ➤ Straight to your inbox!
| Name | Dates | |
|---|---|---|
| MuleSoft Training | May 04 to May 19 | View Details |
| MuleSoft Training | May 07 to May 22 | View Details |
| MuleSoft Training | May 11 to May 26 | View Details |
| MuleSoft Training | May 14 to May 29 | View Details |


Madhuri is a Senior Content Creator at MindMajix. She has written about a range of different topics on various technologies, which include, Splunk, Tensorflow, Selenium, and CEH. She spends most of her time researching on technology, and startups. Connect with her via LinkedIn and Twitter .


Copyright © 2013 - 2024 MindMajix Technologies