In this Jenkins tutorial, we're going to try and cover end-to-end concepts related to Jenkins. Here, we're going to learn about one of Jenkins' most of its distinguishing attributes.: Pipelines in Jenkins. We're going to learn how to manage and handle it. In addition, in this Jenkins tutorial, we will look at how to perform the installation of Jenkins and how to create, schedule, and run builds using Jenkins plugins.
This Jenkins tutorial will give you a kick-start to your DevOps journey and make you skilled in setting up Jenkins and making use of it for continuous integration.
Jenkins Tutorial for Beginners
In this blog on Jenkins tutorial, we will cover the following topics:
| In this Jenkins Tutorial, You will learn the following topics |
What is Jenkins?
Jenkins is an open-source integration tool used to speedier the development of applications in software companies. Using Jenkins, the process of build and testing can be automated and errors, if any, can be identified in the preliminary stages of development itself. As part of the integration, Jenkins continuously executes a pre-defined series of steps and supports the complete life cycle of an application. This Java-based tool is widely used and has immense popularity across the world. In order to use Jenkins, you need an Apache Tomcat web server because it is a server-based tool.
History of Jenkins
Jenkins was developed by Kohsuke Kawaguchi, a Java developer at Sun Microsystems, to automate the repetitive tasks of code building and error fixing in application development and named it Hudson initially. However, it was changed as Jenkins by Oracle, which has taken over Sun Microsystems, had a dispute with the Hudson community. Due to this dispute, Oracle forked Hudson and renamed it, Jenkins. That’s how Jenkins came into existence.
| If you would like to become Jenkins Certified professional, then visit Mindmajix - A Global online training platform: "Jenkins Certification Training". This course will help you to achieve excellence in this domain. |
Advantages of Jenkins
Up to now, we have touched the surface of Jenkins. Let us now see the advantages of it.
Here they are:
- No loss of time as the code is built immediately upon the commitment of the code by the developers
- Building and testing of the code multiple times day
- Notifications to the development team once a build is successful
- Notifications to the development team in case a build is unsuccessful
- Ease of identification of the cause for the errors
- Deployment of code after every successful build and testing
- Support to a cloud-based architecture
With all the above advantages, Jenkins makes the application development life cycle much faster, which in turn results in an increase in revenue.
Though there are multiple advantages with Jenkins, there are a few flaws with it as well. Here they are:
- Difficulty in activity monitoring, since Jenkins runs on a server and there is a need for special skills
- Difficulty in installing and configuring
- Complex user interface when compared to the latest UIs

Downloading and Installing Jenkins
Let us now see the perquisites for installing Jenkins.
Pre-requisites
|
Requirement
|
Specification
|
|
Hardware Requirements
|
Minimum 256 MB of RAM
Minimum 1 GB of hard drive space
|
|
Software Requirements
|
Anyone of the following:
|
Apart from the above, you need to understand that Jenkins provides two types of releases based on the needs of an organization. These two types are – long-term (12 weeks) and weekly.
Let us now see how to download Jenkins.
How to download and install Jenkins?
The following steps enable you to understand how to download and install Jenkins:
1. Go to Jenkins
The Downloads page is displayed with multiple operating systems including Docker, macOS, OpenBSD, OpenSUSE, Redhat, Ubuntu, and Windows, etc.
2. On the Downloads page, select the desired Operating System. For example, Windows.
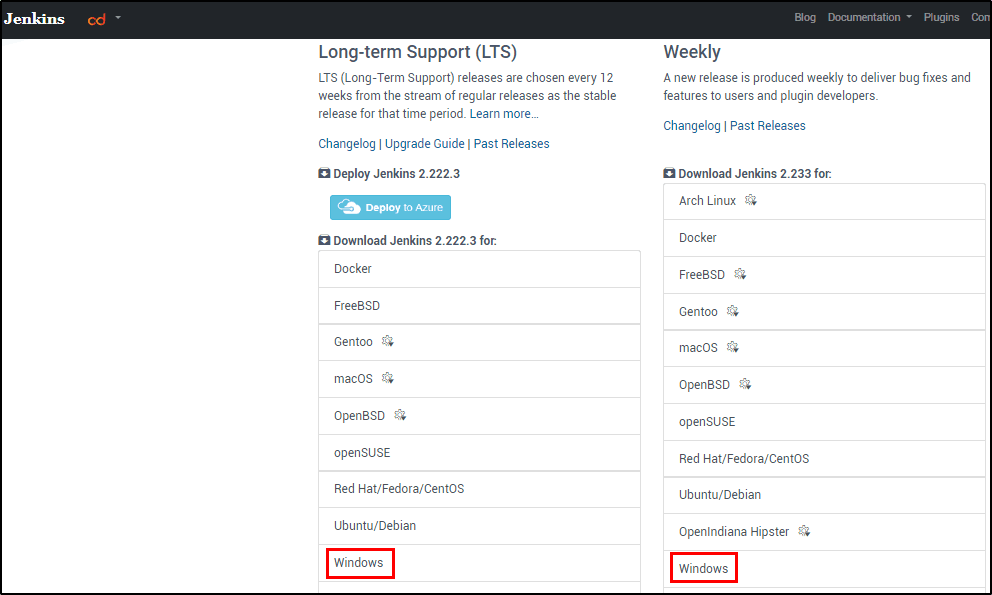
The Jenkins zip folder is downloaded.
3. Save the Jenkins zip folder in the desired location.
4. Go to the location where the Jenkins zip folder is downloaded and unzip it.
5. Double-click on Jenkins.msi. See the screenshot below:
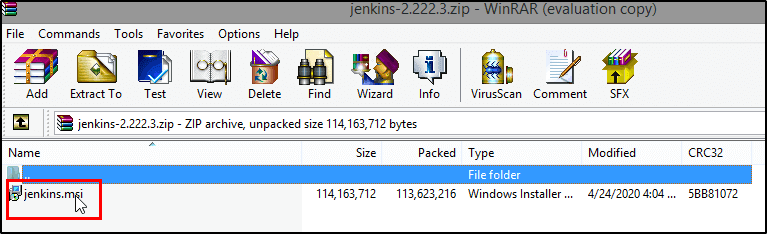
The Jenkins Setup screen is displayed.
6. On the Jenkins Setup screen, click the Next button.
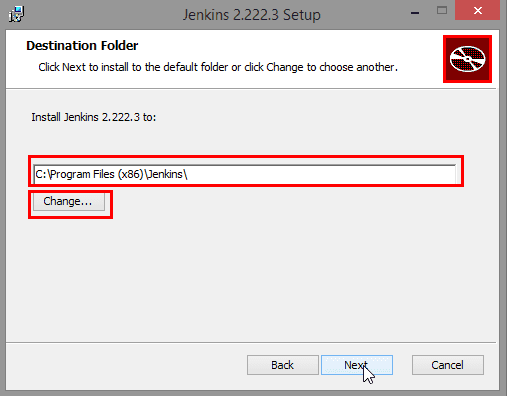
7. Now, you need to specify the destination folder where wish the Jenkins to be installed. You can either choose the default location or select another one by clicking the Change button. Once chosen, click the Next button.
See the screenshot below:
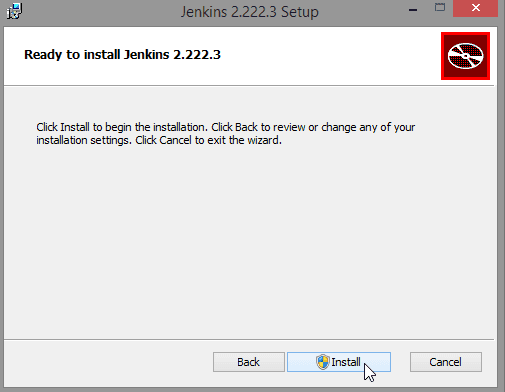
8. Setup is now ready to start the installation. In case, you wish to make any change, click the Back button. To proceed further with the installation, click the Install button. If you wish to exit the wizard, click the Cancel button.
9. Once the installation process is done, click the Finish button.
| Related Article: Jenkins Installation on Windows |
Configuring Jenkins
After installing Jenkins, you need to configure it. The following information enables you to understand how to configure Jenkins:
1. Open a browser and type http://localhost:8080/
Note: The default port of Jenkins is 8080. Successful accessing of this URL (http://localhost:8080/) is an indication of the installation of Jenkins in your system.
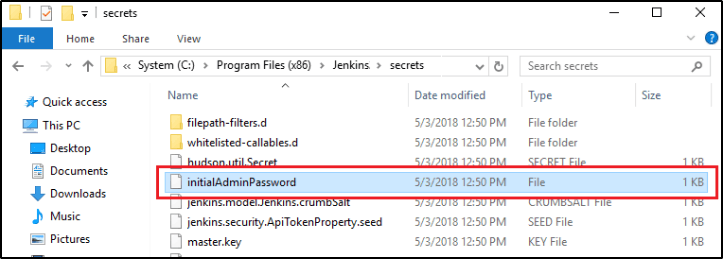
2. Copy the initial Administrator Password from the server file system.
Note: You can find the initial Administrator password under the Jenkins installation path. If you have chosen the default installation path, then you can find the password in the C: Program Files (x86)Jenkinssecrets file. In case, you have chosen a different path other than the default path, then you need to check that location for the password. See the screenshot below.
| Related Article: Continuous Integration with Jenkins |
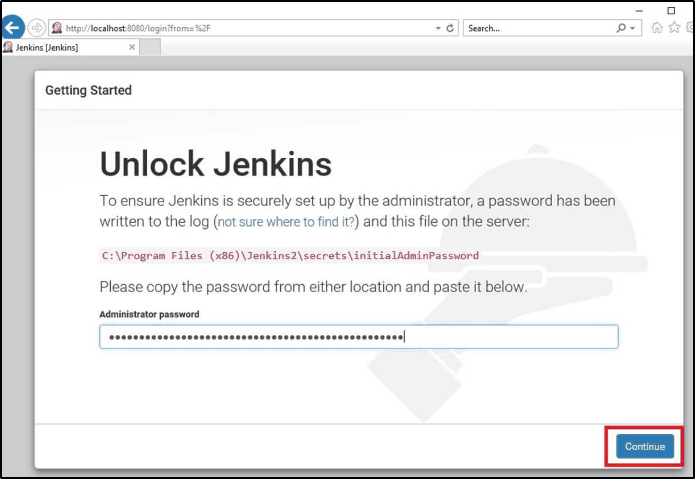
3. After copying the password, paste it in the Administrator Password field in the Getting Started screen. See the screenshot below:
4. Click the Continue button.
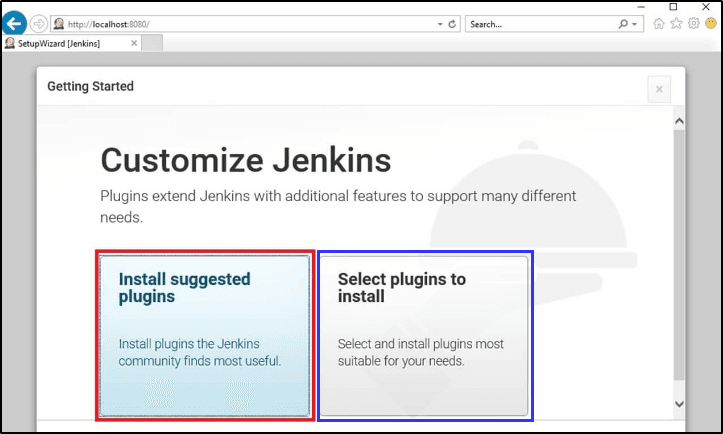
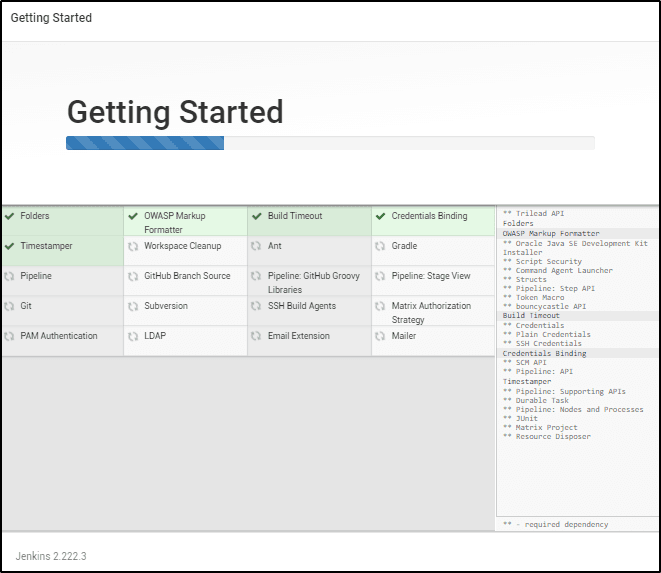
5. Next, it is time to configure the plugins, which provide more power to Jenkins. To install the suggested plugins, click the Install suggested plugins button. If you wish to select the desired plugins, then click the Select plugins install.
6. The plugins start installing. See the screenshot below.
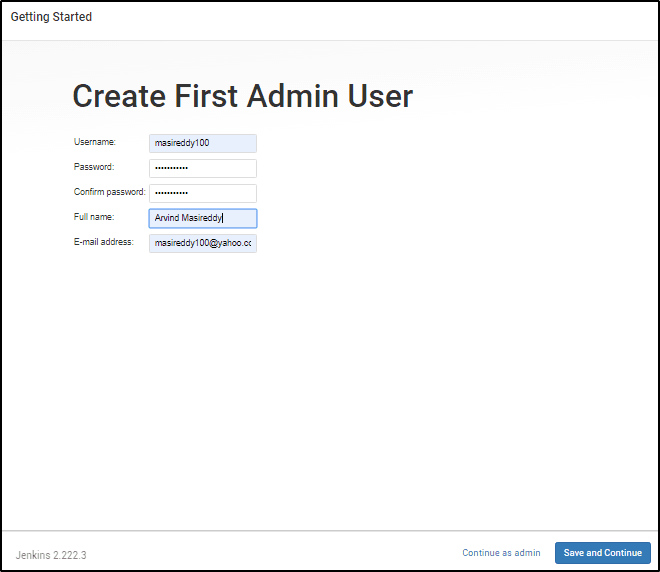
7. Once the plugins are installed, the Create First Admin User screen is displayed. On the Create First Admin User screen, enter the User name and Password. After entering the password, reenter it for confirmation. Next, enter your full name and email ID, and then click the Save and Continue button.
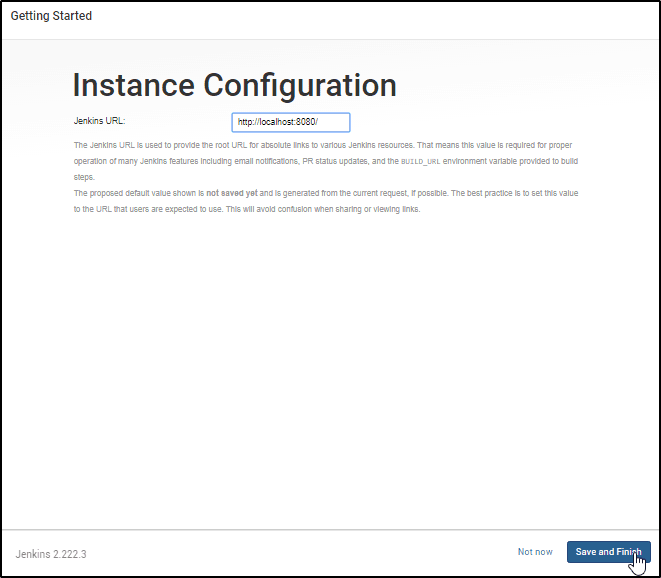
8. In the next screen, you will see the display of the Jenkins URL, which is by default. Click the Save and Finish button.
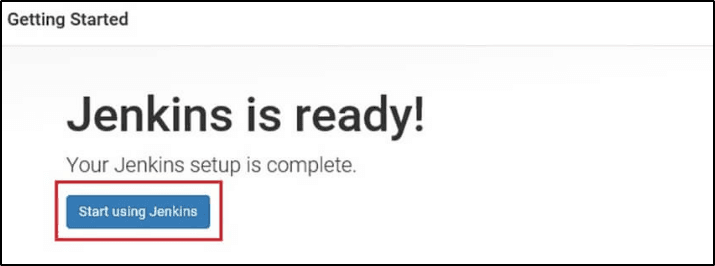
9. With this Jenkins is installed in your system. To start using it, click the Start using Jenkins button.
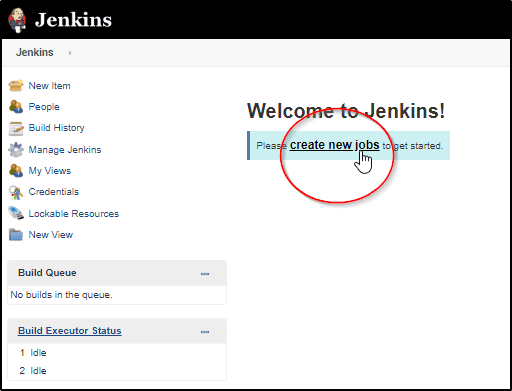
Jenkins is up now. To create a new job, click create new jobs link.
User Management in Jenkins
As part of user management, you can create new users, edit the existing user profile, and also delete the users.
Creating a new user
1. On the left menu of Jenkins Dashboard, click Manage Jenkins.
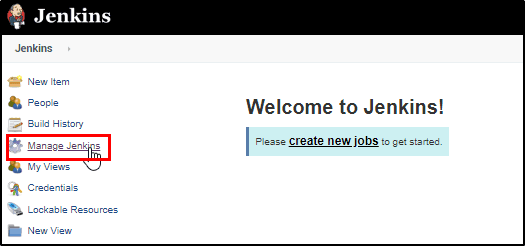
The Manage Jenkins page is displayed.
2. On the Manage Jenkins page, scroll down to the bottom and then click Manage Users.
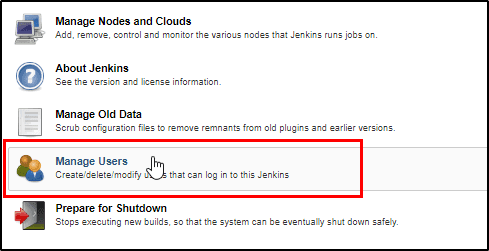
The Users page is displayed.
3. On the Users page, click Create User.
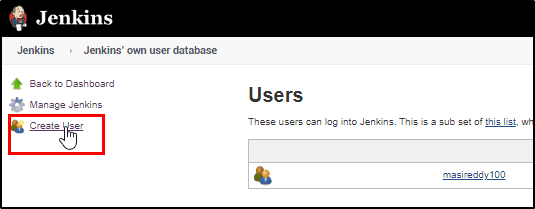
The Create User page is displayed.
4. On the Create User page, enter the new user name and password, confirm the password, enter the full name of the user, and email ID.
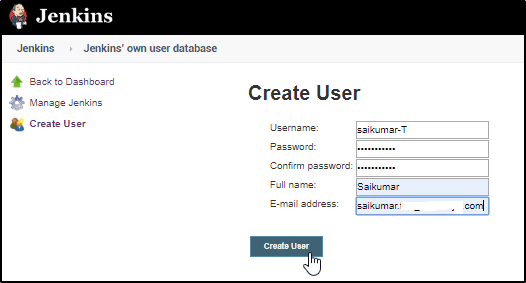
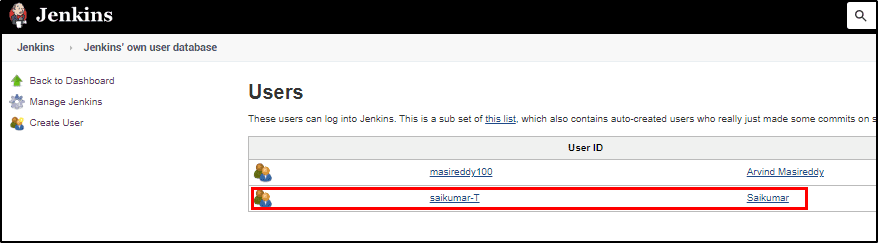
The new user is created. See the screenshot below.
Editing a user profile
1. On the Users page, click the icon corresponding to the user whose profile you wish to edit.
The user profile page is displayed.
2. On the User profile page, make the desired changes.
Note: For example, you can change details such as user full name, add or change the description, change the email ID, notification URL, password, and time zone, etc.
3. Finally, click the Save button at the bottom.
The user profile is changed.
| Related Article: Jenkins Installation on Ubuntu |
Deleting a user profile
1. On the Users page, click the icon corresponding to the user whom you wish to delete.
The delete message is displayed.
2. On the delete message, click the Yes button if you wish to delete the user. See the screenshot below.
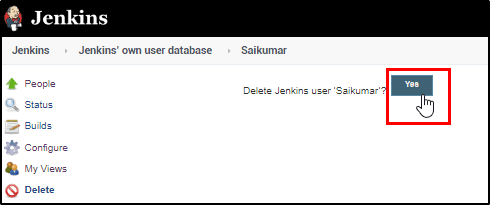
The user is deleted.
Pipelines in Jenkins
Pipelines can be said a group of plugins or jobs, which enable the continuous integration process. These jobs are interlinked and also interdependent. You can define Jenkins pipelines by using Jenkins File. This file provides you to create pipelines for all the branches and also enables you to review code in the Jenkins pipeline. The major advantage of the Jenkins pipeline is - it provides the creation of multiple automation jobs. Some of the other advantages of Jenkins Pipelines include the following:
- Automatic resumption of pipeline in case of an unexpected server restart
- Provision to support large projects
- Facility to pause the pipeline process
- Provision to edit by multiple users
To create a pipeline, you need to first install the Build Pipeline plugin.
| Explore Jenkins Sample Resumes! Download & Edit, Get Noticed by Top Employers! |
Let us now go through how to install the Build Pipeline plugin.
How to install a Build Pipeline Plugin?
1. On the left side of the menu, click Manage Jenkins. Then the Manage Jenkins page will get displayed.
2. On the Manage Jenkins page, scroll down and click the Manage Plugins tab. The Manage Plugins page is displayed.
3. On the Manage Plugins page, click the Installed tab to check if the Build Pipeline plugin is already installed.
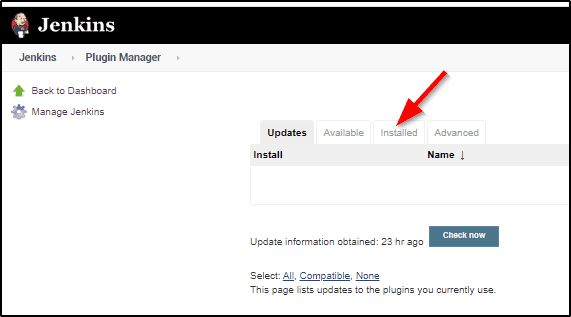
4. If the Build Pipeline plugin is already not installed, click the Available tab, and then install the plugin.
With the above steps, you can install the Build Pipeline plugin. Once it is installed, you can create the pipeline.
How to create a Pipeline plugin?
1. On the Dashboard, click the + button next to All.
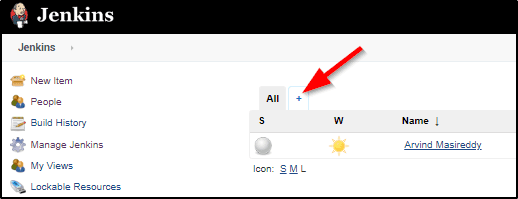
The View name filed is displayed.
2. In the View Name field, enter a name for the pipeline.

3. Next, select to build a pipeline view.
4. In the next screen, accept the default settings, and then click the OK and Apply.
With this, the pipeline is created.
Conclusion:
So far in this Jenkins tutorial, you have learned about what Jenkins is, its history, its advantages, how to download, install, and configure it, user management in Jenkins, and how to create pipelines in Jenkins. Now, let us see the certification part.
 On-Job Support Service
Online Work Support for your on-job roles.

Our work-support plans provide precise options as per your project tasks. Whether you are a newbie or an experienced professional seeking assistance in completing project tasks, we are here with the following plans to meet your custom needs:
- Pay Per Hour
- Pay Per Week
- Monthly
| Name | Dates | |
|---|---|---|
| JENKINS Training | Jul 21 to Aug 05 | View Details |
| JENKINS Training | Jul 25 to Aug 09 | View Details |
| JENKINS Training | Jul 28 to Aug 12 | View Details |
| JENKINS Training | Aug 01 to Aug 16 | View Details |

Ravindra Savaram is a Technical Lead at Mindmajix.com. His passion lies in writing articles on the most popular IT platforms including Machine learning, DevOps, Data Science, Artificial Intelligence, RPA, Deep Learning, and so on. You can stay up to date on all these technologies by following him on LinkedIn and Twitter.