- Home
- Blog
- Java Spring
- Spring Boot Installation on Windows

- Spring Boot Interview Questions
- Spring Boot vs Spring MVC
- Spring Cloud Tutorial
- Spring Tutorial
- Java Spring Interview Questions
- What is Bean in Java Spring
- Spring Cloud Interview Questions
- Spring Boot Tutorial
- Spring MVC Interview Questions
- Spring Boot Projects and Use Cases
- Java Spring Projects and Use Cases
- Java Spring Tutorial
Developing Robust Applications in the ever-changing world of software development can be challenging. Spring Boot, a Java Framework, has revolutionized how Java applications are written, deployed, and maintained. It automatically configures common application components based on the project's dependencies. In this blog, we will guide you to install Spring Boot in your machine step by step, along with its overview and features.
Let's start!
Table of Contents
- Introduction to Spring Boot
- Features of Spring Boot
- Prerequisites to install Spring Boot
- Steps of Spring Boot Installation
- Spring Boot FAQs
Introduction to Spring Boot
To develop an Application or Software that communicates with other computers via the Internet, you must define a set of new instructions and rules, such as instructing your computer on how to communicate with a database or handle web pages. Spring Boot enables you to perform these Complex Tasks with simple steps.
It is a Java-based Framework used to configure and build robust, production-ready Java-based Applications. It has embedded web servers like Tomcat, Jetty, or Undertow, which enables developers to package their applications as self-contained JAR or WAR files. This eliminates the need to configure complex server setups. It also offers auto-configuration that reduces manual configuration efforts and accelerates product development. Before we install the Spring Boot in our Windows System, let us see some of the notable features of Spring Boot.
| Do you want to enrich your career by learning Spring Boot? Then Enroll in "Spring Boot Training", this course will help you to boost your career. |
Features of Spring Boot
- Spring Boot apps are self-contained and can be run independently. They do not need complex application server configurations, which makes deployment simpler.
- The Starter packages have pre-configured sets of dependencies such as web development, data access, and messaging. This simplifies project setup and dependency management.
- It features embedded web servers, which allow you to run web applications without deploying them to a separate server.
- It provides defaults for numerous setup options, ensuring that applications are ready for production by default. These defaults are easily customizable.
- It includes development-time capabilities such as automatic program restart, live change reloading, and remote debugging. During the development process, it increases developer productivity.
Prerequisites to Install Spring Boot
- You need to install the right JDK on your system. This is because Spring Boot works based on Java programming. For example, Spring Boot 2.5 is compatible with Java 8, java 11, and Java 16 versions.
- You must install an IDE on a Java environment like Eclipse.
Related Article: Spring Boot Tutorial
Steps of Spring Boot Installation
Following are the steps to download and install Eclipse IDE in Windows.
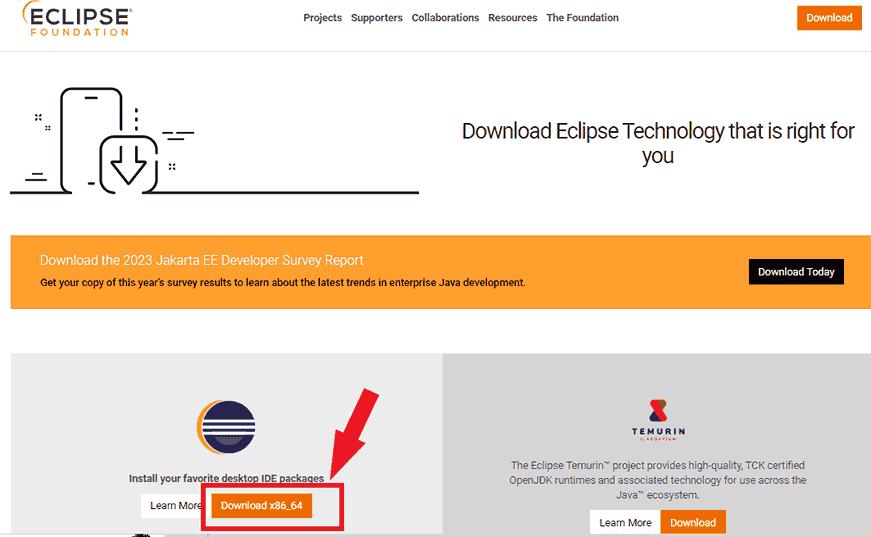
- Step 1: First, you have to eclipse IDE. Go to the official website https://www.eclipse.org/downloads/ and click on the ‘Download’ button as shown below.
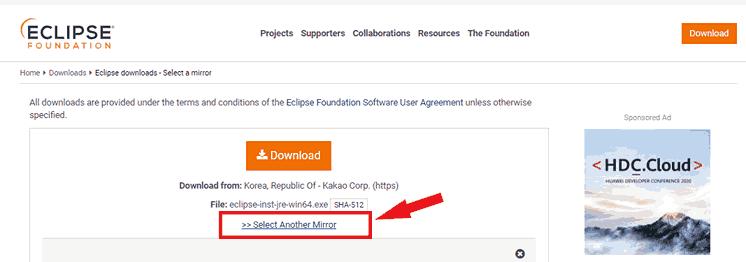
- Step 2: Click on the ‘Select Another Mirror’ option as illustrated below.
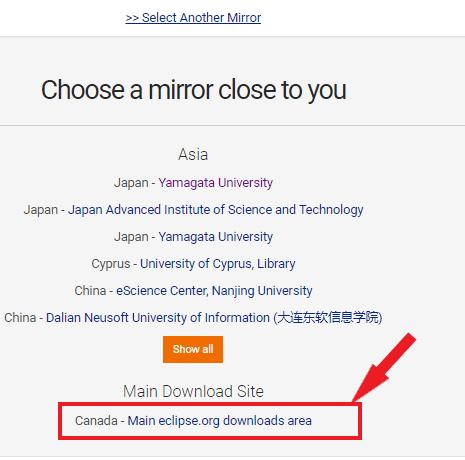
- Step 3: Click on the ‘Main eclipse.org download area’ option from the options as shown below. It allows downloading set-up files.
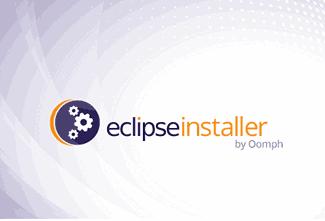
- Step 4: Now, you can identify the downloaded setup file from the respective folder. Next, you can double-click the file. Soon after, a pop-up will come up, as shown below.
- Step 5: You have to click on the ‘Eclipse IDE for Java Developers’ to install the Eclipse IDE in your system as depicted below:
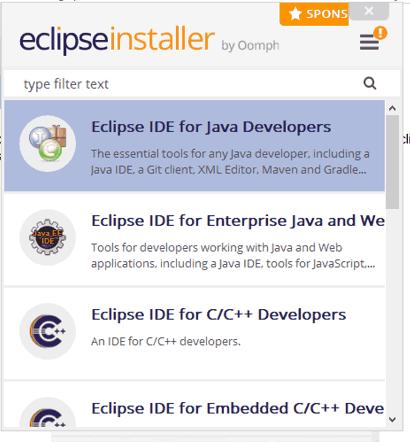
- Step 6: Now select the folder location. It helps to install the Eclipse IDE.
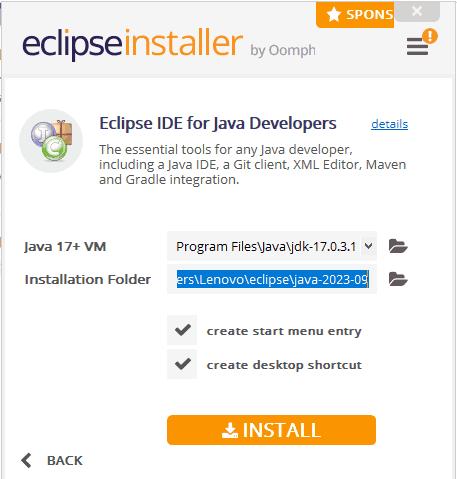
- Step 7: Now, click the install button to enable the Eclipse IDE.
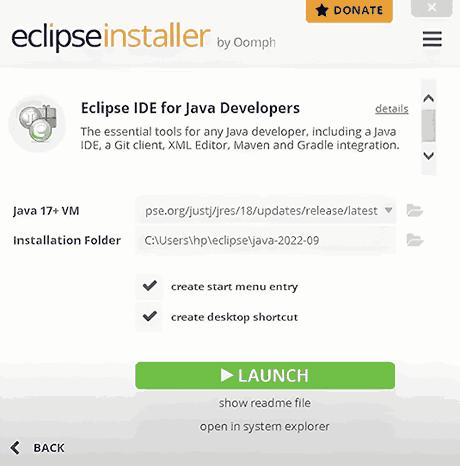
- Step 8: Select the destination folder to launch your eclipse environment once the eclipse is enabled.
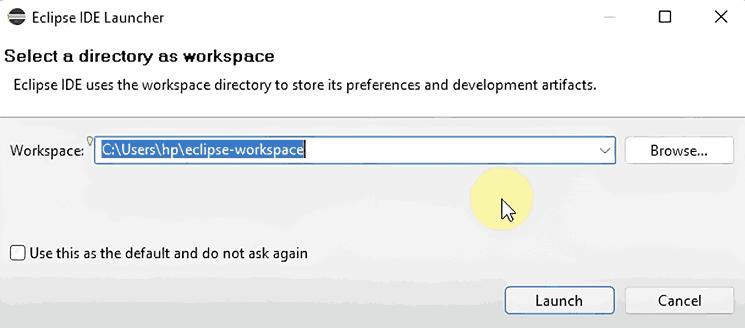
- Step 9: The Eclipse IDE screen appears after you click on the launch option, as demonstrated below.
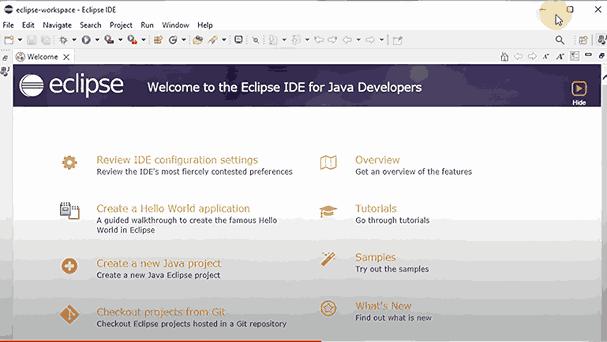
After we have installed Eclipse in our system, let us move on to the Spring Boot Installation.
Steps to Install Spring Boot in Windows
- Step 1: Visit the official Spring Tools Suite Download Page: https://spring.io/tools. The Screen appears as shown below.
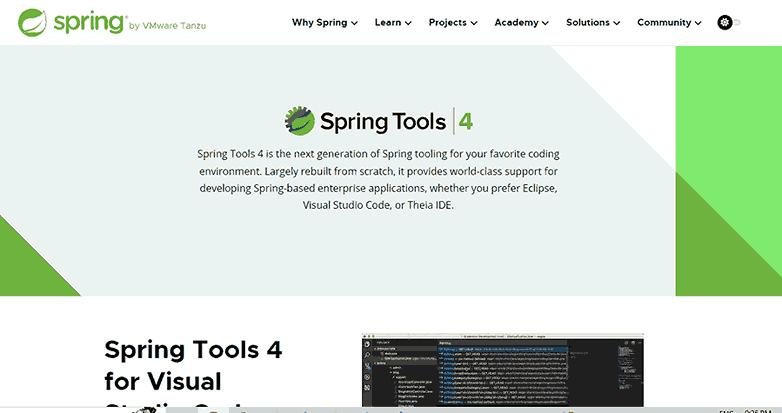
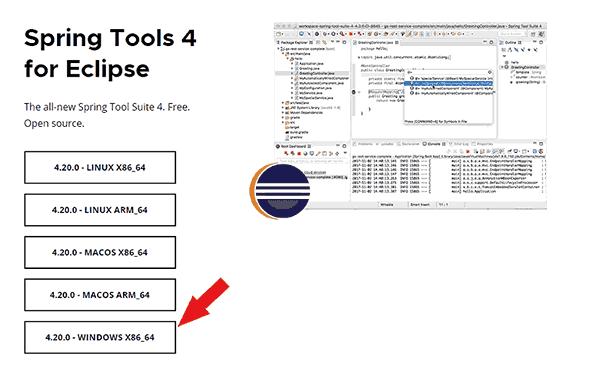
- Step 2: You must scroll down to see the latest Spring Boot Tools Suite for Windows versions. Now, you can click on the Windows x86_64. So you can start downloading the spring boot installer for Windows.
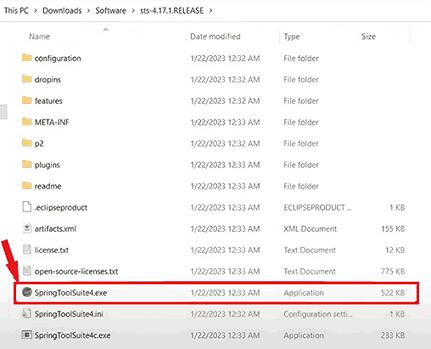
- Step 3: Once you have downloaded the installer, you can identify the downloaded file. You can identify it in your download folder. Now, you can extract the JAR file. After proper extraction, we will have a folder ready with a .exe file, which needs further execution.
- Step 4: Additionally, we need to select a proper directory to run the Spring Tools application
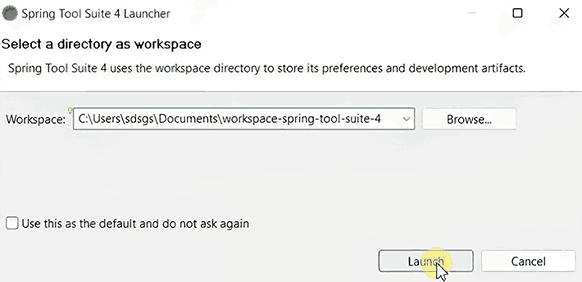
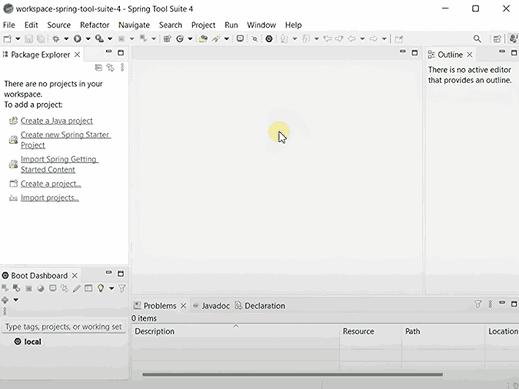
- Step 5: After you have selected the appropriate directory, your application will start running immediately.
Spring Boot FAQs
1. What is Spring Boot Auto Configuration Feature?
Generally, you have to configure the Application Components manually. Spring Boot supports the Auto Configuration Feature, configuring the components based on the classpath dependencies.
2. Is Spring and Spring Boot the same?
No, Spring is a framework for building Java applications. On the other hand, Spring Boot is typically an extension of the Spring framework. It simplifies application setup and development by providing defaults and auto-configurations.
3. Is Spring Boot compatible with other Java frameworks?
Yes, Spring Boot is compatible with various Java technologies and frameworks. You integrate Spring Boot with libraries like Java EE, hibernate, and JPA. It helps to meet the specific project requirements.
4. How can you deploy spring boot applications to production servers?
You need to package spring boot applications in a JAR or WAR file. Then, you need to deploy them in production servers or cloud platforms. But, you must first know the deployment guide for the particular platform.
5. How do you connect the Spring Boot application to a database?
To connect your Spring Boot application to a database, you must define a data source configuration in the application properties or YAML file. Then, select a JDBC driver and use Spring Data repositories or JDBC templates for data access.
Conclusion
Spring boot is used to build various applications, from Dynamic Web Applications to powerful Microservice Architectures. It supports modular development with built-in support for data access, security, and server configurations. It also has the Spring Boot Actuator that supports application monitoring, metrics collection, and health checks through HTTP endpoints. They can be used to address the various production concerns. You are now ready to spearhead your Application Development with the Spring Boot. If you want to learn more about spring boot, you can enroll in spring boot training in MindMajix. You will become a certified spring boot developer and get job-ready.
 On-Job Support Service
Online Work Support for your on-job roles.

Our work-support plans provide precise options as per your project tasks. Whether you are a newbie or an experienced professional seeking assistance in completing project tasks, we are here with the following plans to meet your custom needs:
- Pay Per Hour
- Pay Per Week
- Monthly
| Name | Dates | |
|---|---|---|
| Spring Boot Training | Jan 31 to Feb 15 | View Details |
| Spring Boot Training | Feb 03 to Feb 18 | View Details |
| Spring Boot Training | Feb 07 to Feb 22 | View Details |
| Spring Boot Training | Feb 10 to Feb 25 | View Details |

Madhuri is a Senior Content Creator at MindMajix. She has written about a range of different topics on various technologies, which include, Splunk, Tensorflow, Selenium, and CEH. She spends most of her time researching on technology, and startups. Connect with her via LinkedIn and Twitter .


