- Home
- Blog
- Confluence
- How to install Confluence

Managing the software project is fine and scaling it to multiple teams is awesome! But, making it consistent throughout its lifecycle using effective collaboration and communication is a key factor to its success. Confluence addresses this issue and provides an easy-to-use team workspace where the team members can manage their project workflow.
We can create dynamic content using Page trees and whiteboards to visualize the work which is accessible easily to other team members. In this article, we will learn about Confluence, including its overview, features, and simple steps to install it on your Windows System. So, without any delay, let us get started with Confluence.
Table of Contents
- Overview of Confluence
- Features of Confluence
- Prerequisites for Installing Confluence
- Steps for Confluence Installation
- Frequently Asked Questions
Overview of Confluence
Confluence is a Workspace Tool developed by Atlassian to manage communication among the team members and key stakeholders associated with the project. It enables us to manage teams of any size and type so that risk-driven projects can be easily completed. It supports multiple configuration options to create the dynamic pages that are stored in the Space, typically a workspace.
Now, let us look at some of its notable features before moving on to installation.
| Want to get certified and build your career in Confluence? Then enroll in "Confluence Online Training" this course will help you to achieve excellence in this domain. |
Features of Confluence
- It supports multiple hosting options
It can be installed and configured on the Cloud Storage as well as our local hardware machine. Along with this, it can be configured on the Data Center which is a self-managed service.
- It allows integration with other platforms
We can easily integrate with other apps and third-party platforms for better collaboration. It also supports integration with Jira, a project management tool.
- It allows to track the history of content
Confluence supports page versioning using which we can track the history of the page content. Thus, it is easy to know the changes, compare versions, and revert the unnecessary changes in the workspace content.
- Confluence provides multiple templates for the workspace
There are multiple templates available in Confluence. This feature is useful for beginners to easily create a workspace for a project without creating it from scratch.

Prerequisites For Installing Confluence
Hardware Requirements
Before installing Confluence, make sure that minimum hardware requirements are fulfilled as stated below:
- CPU: Quad-core processor with minimum 2GHz capacity.
- Memory: 6GB of free RAM.
- Storage: 10GB of free database storage.
It is important to note that Confluence is only supported on x86 hardware and 64-bit derivatives of x86 hardware. So, check for these requirements before installation.
Supported Platforms
You can install Confluence on Microsoft Windows and most of the Linux distributions. However, on MacOS or OSX, only Confluence evaluation can be done. We cannot run our production Confluence site on a Mac. We recommend you visit the official documentation https://confluence.atlassian.com/doc/system-requirements-126517514.html to get more information about System requirements.
Database Configuration
To run confluence, we have configured the database where the workspace data will be stored. Confluence supports various databases such as PostgreSQL, MySQL, Oracle, Amazon Aurora, Microsoft SQL Server, etc. Here, we are using Microsoft SQL Server which is configured using the following set of steps.
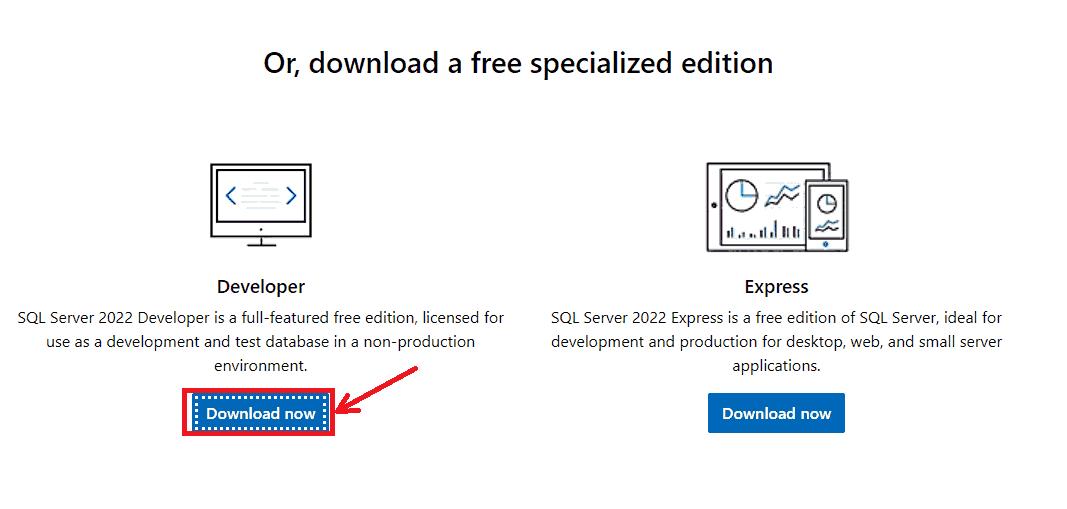
- Step 1: Go to https://www.microsoft.com/en-us/sql-server/sql-server-downloads. Choose the SQL Server developer edition and click on the download button.
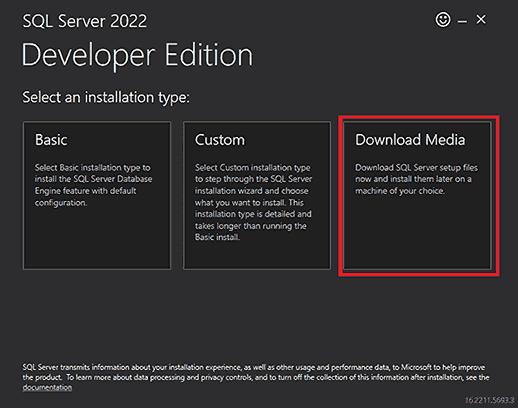
- Step 2: Locate the downloaded file and double-click on it to start the installation. Now, choose the ‘Download Media’ Installation as shown below.
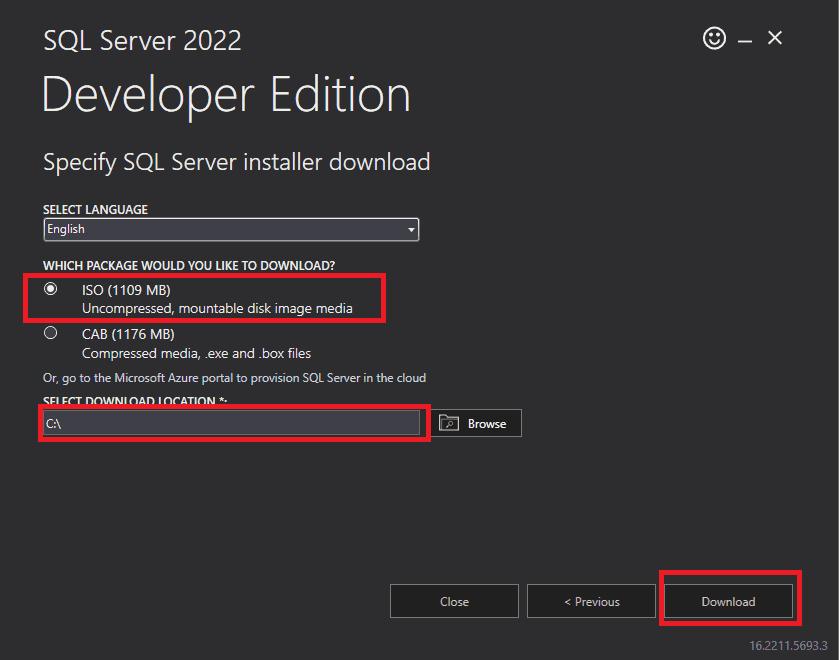
- Step 3: Specify the path to the directory where you want to download the file and click on the ‘Download’ button.
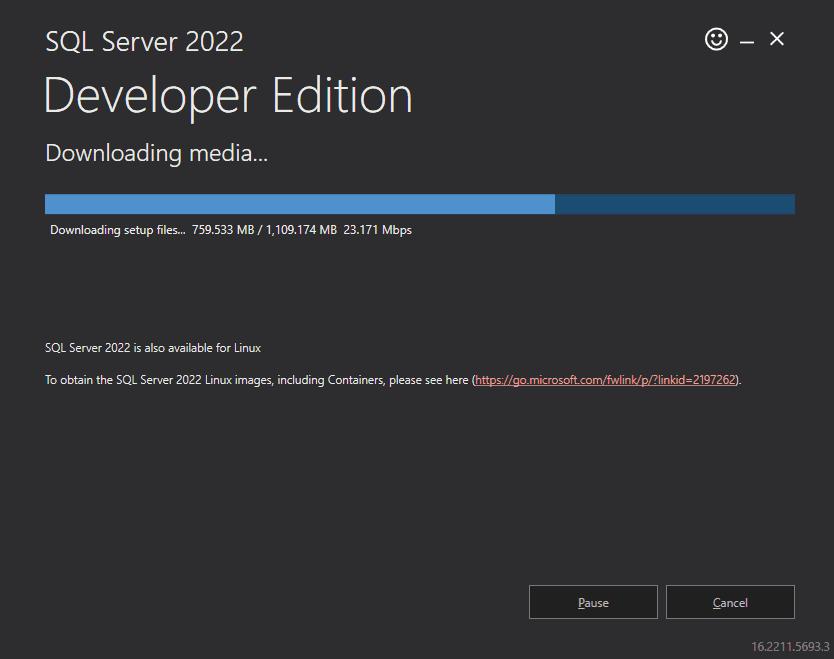
- Step 4: The ISO file starts downloading as depicted below.
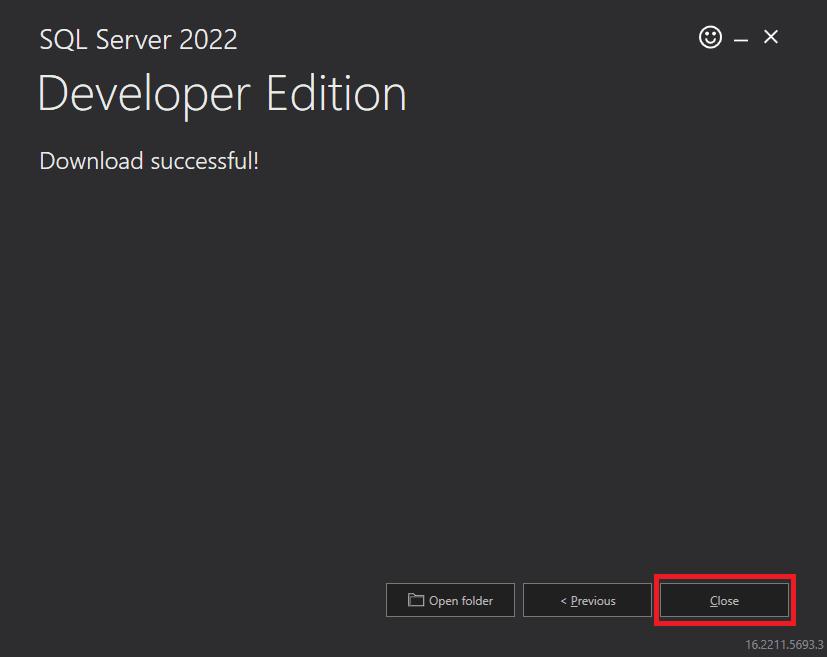
- Step 5: Close the setup once the download is complete.
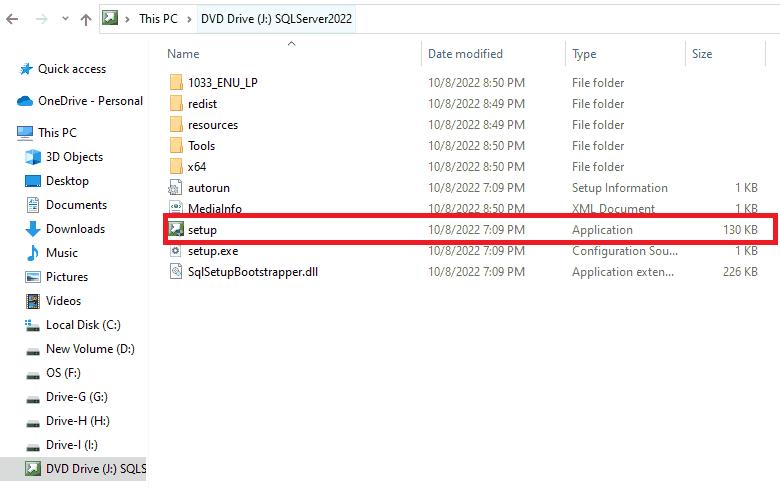
- Step 6: Navigate to the directory where the ISO file has been downloaded. Double-click on the file to mount it. Then, go to the mounted disk as shown below. Click on the ‘setup’ file.
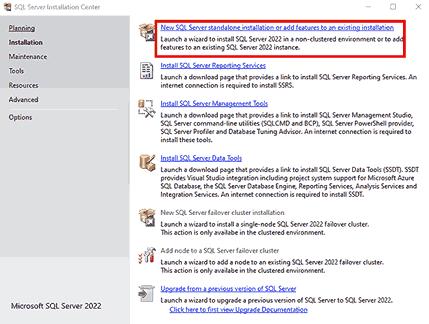
- Step 7: The installation wizard appears as shown below. Go to the installation tab and select the SQL Server Installation as illustrated below.
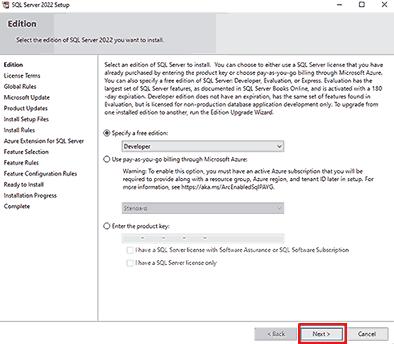
- Step 8: Keep the ‘Developer’ edition as selected and select ‘Next.’
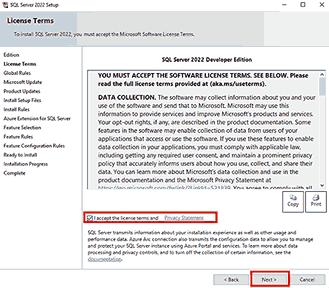
- Step 9: Accept the licensing terms and continue by clicking on ‘Next.’
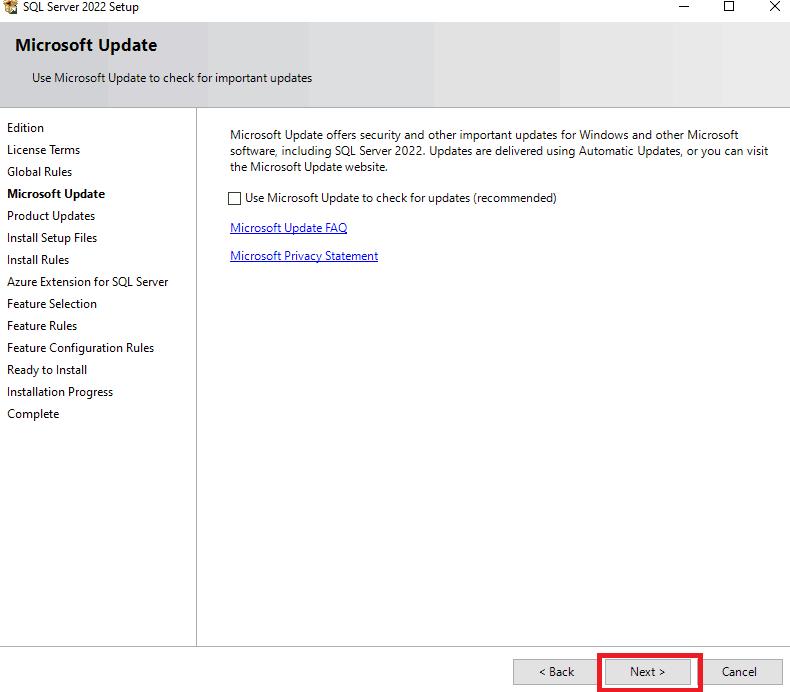
- Step 10: If you wish, you can select the Microsoft Update option to regularly check the updates. Then, click on ‘Next.’
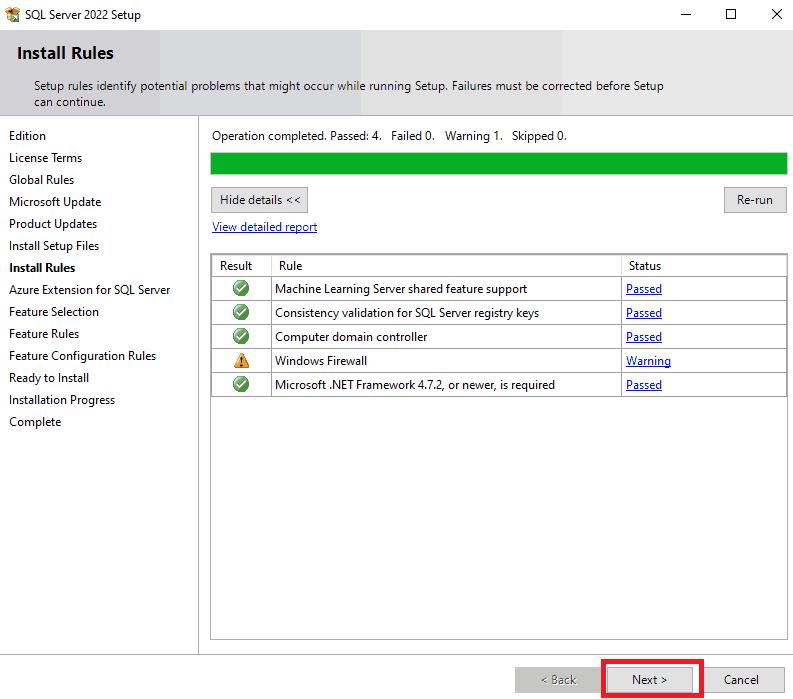
- Step 11: After the checks are performed, click on the ‘Next’ button to continue.
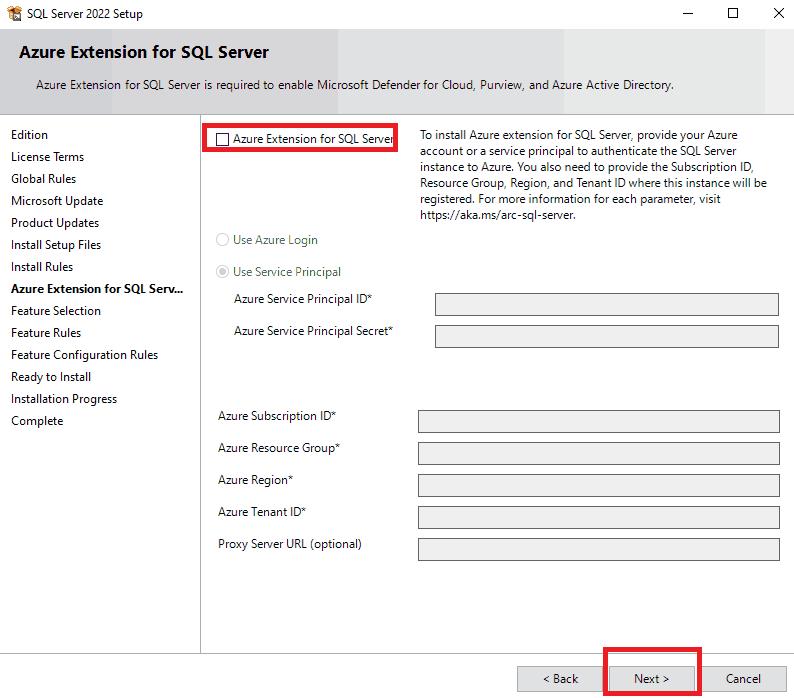
- Step 12: Uncheck the option for Azure Extension and select the ‘Next’ option.
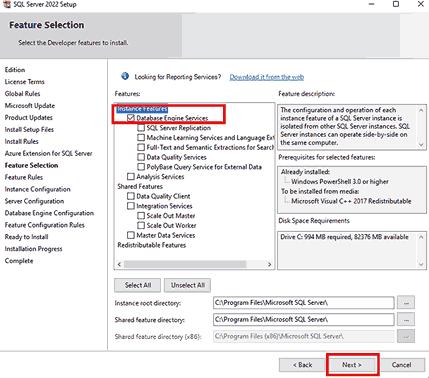
- Step 13: Select the ‘Database Engine Feature’ and click ‘Next.’
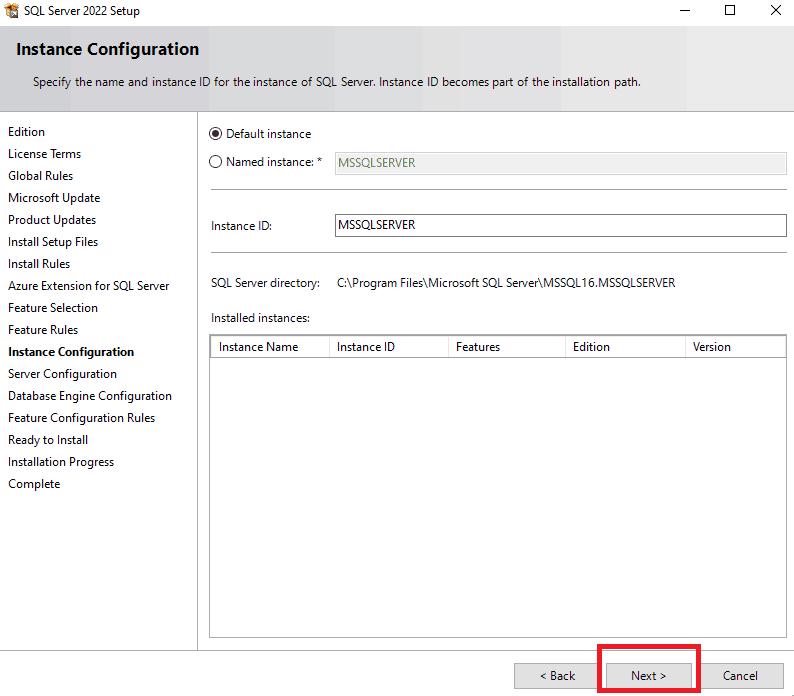
- Step 14: Leave the default instance name and continue to ‘Next.’
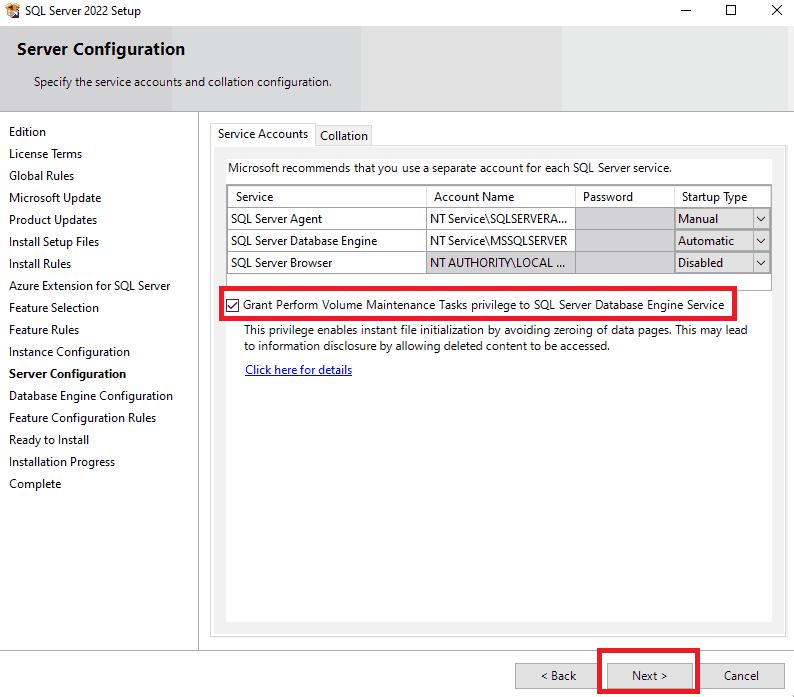
- Step 15: Select the checkbox as shown below and select ‘Next.’
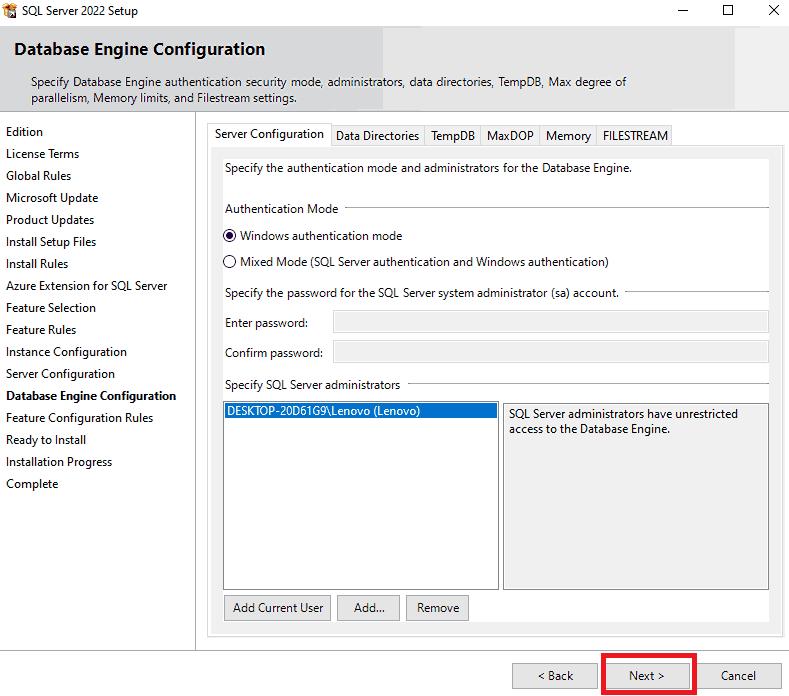
- Step 16: Keep the authentication mode default and click on the ‘Next’ button.
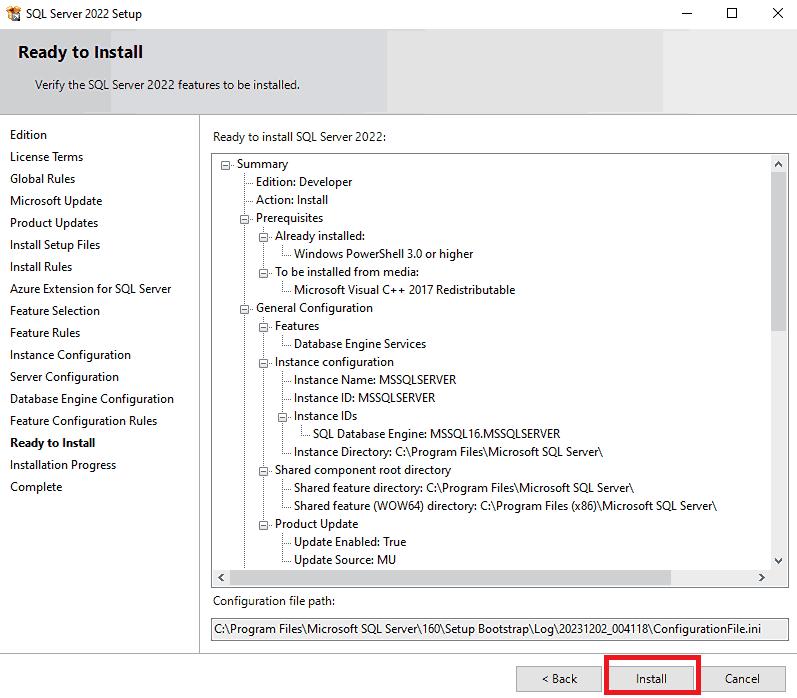
- Step 17: Click on the ‘Install’ button to start the installation.
- Step 18: Close the setup after the installation is complete as shown below.

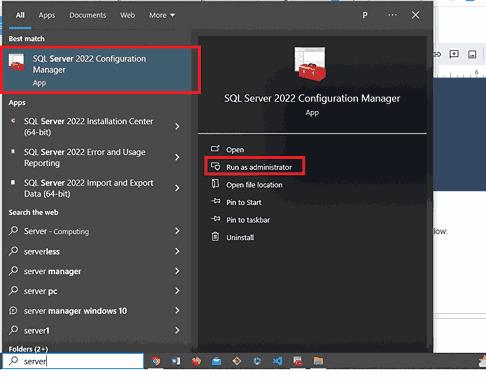
- Step 19: Now, open the server configuration manager as demonstrated below.
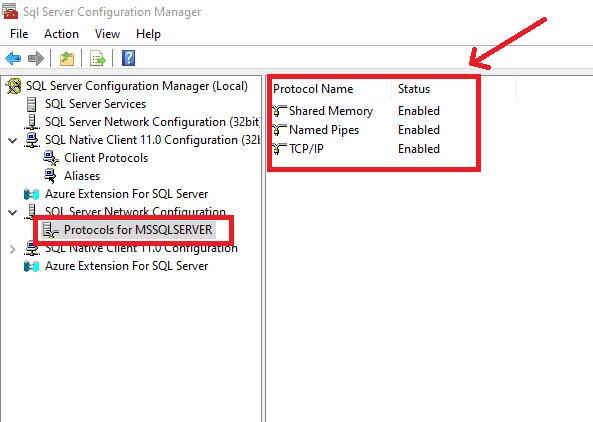
- Step 20: Enable the protocols for the SQL Server.
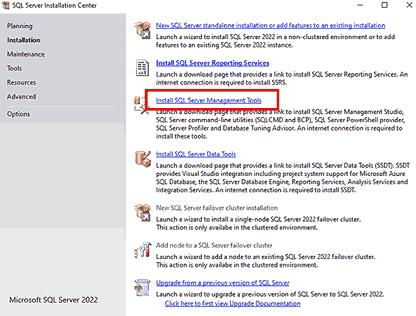
- Step 21: On the setup file that is opened, choose the ‘Install Server Management Tools’ option.
- Step 22: You will be redirected to the Microsoft Official site. Click on the download link as illustrated below.
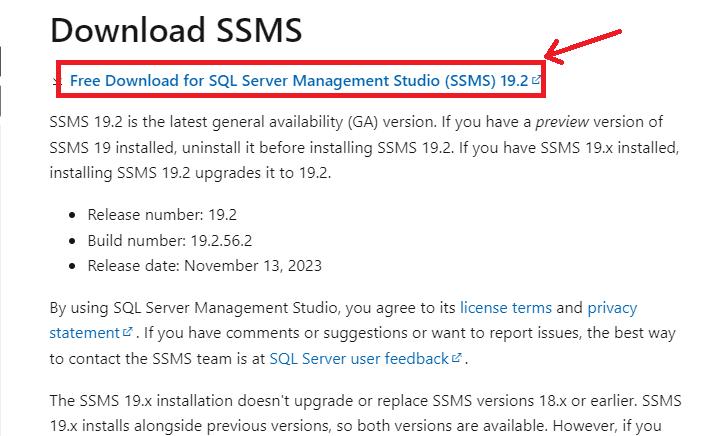
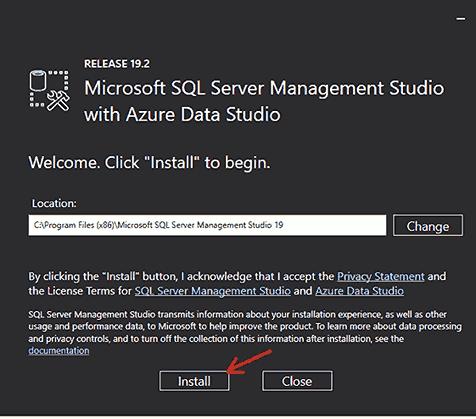
- Step 23: Go to the folder where the SSMS setup is downloaded and run it. The installation launches as outlined below. Click on the ‘Install’ button to continue. The installation begins as shown below:
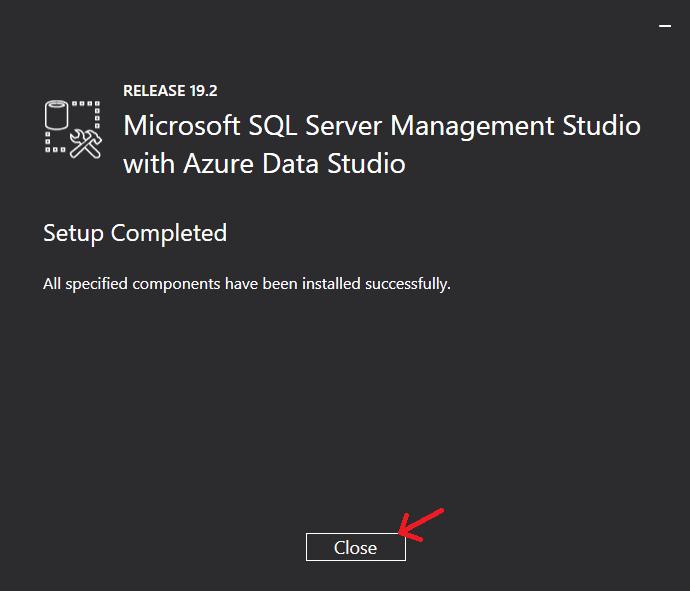
- Step 24: Close the setup after the installation is completed.
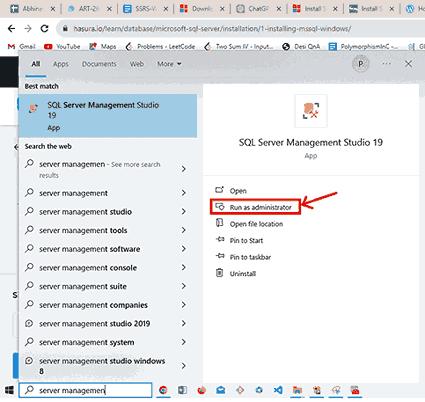
- Step 25: Launch the Server Management Studio by running it as administrator.
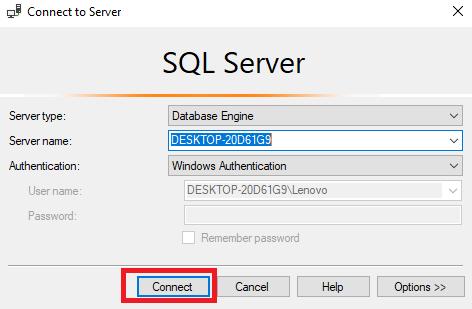
- Step 26: Connect to the database server with default credentials as shown below:
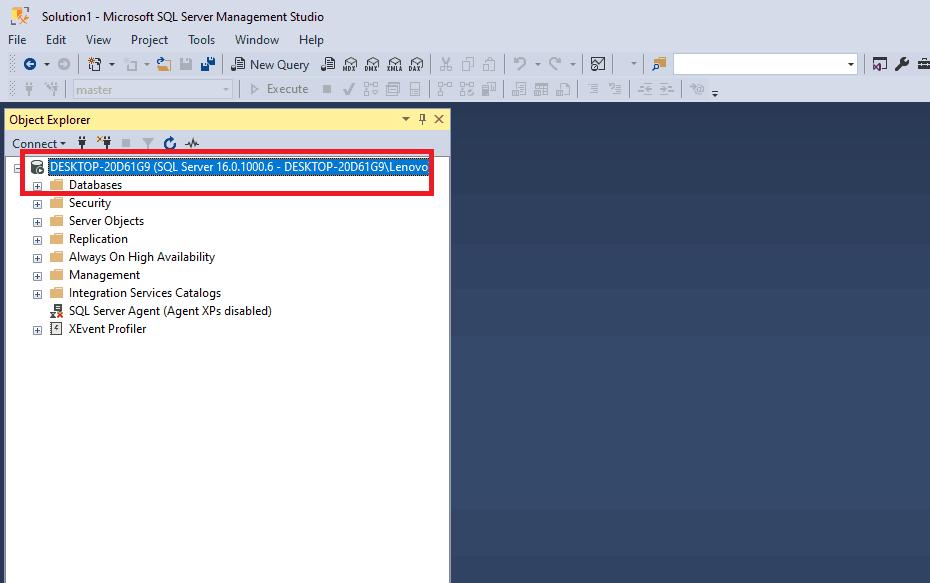
- Step 27: The server connection is visible in the studio as shown below.
- Step 28: Create a new database with any name. Here, we are naming the database as ‘confluence’ for simplicity.

Thus, we can now install the Confluence on our Windows System.
Steps for Confluence Installation
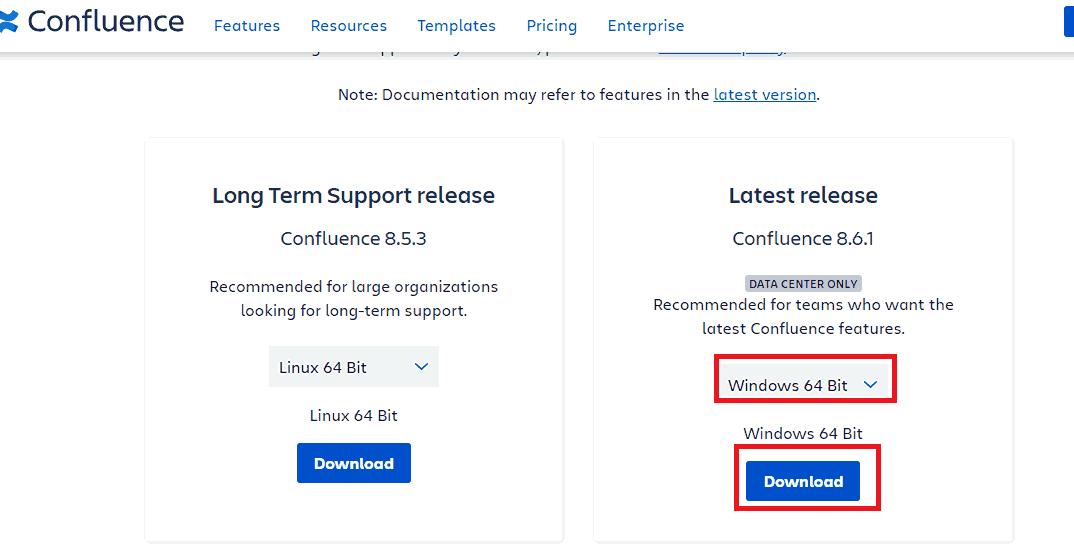
- Step 1: Go to the website https://www.atlassian.com/software/confluence/download-archives and choose the version for ‘Windows 64-bit as shown below.
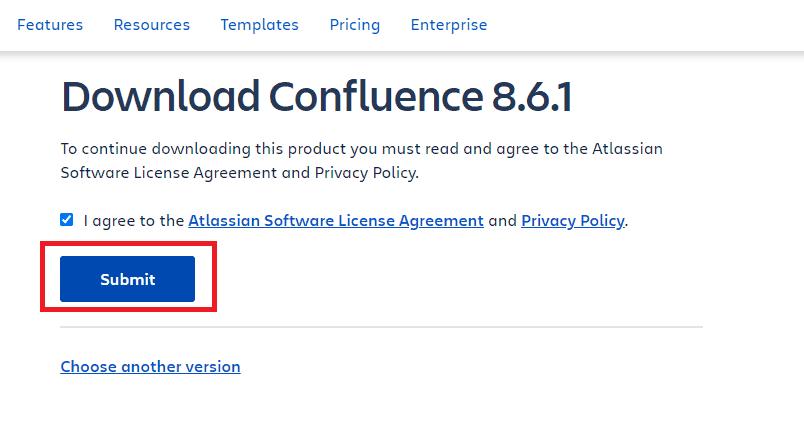
- Step 2: Accept the licensing terms and click the ‘Submit’ button to download the file.
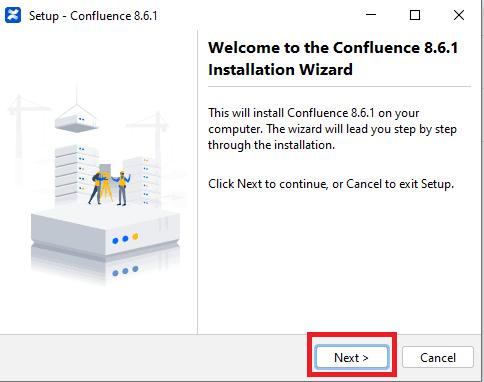
- Step 3: Locate the file where it has been downloaded and double-click on it to start the wizard. Click on ‘Next.’
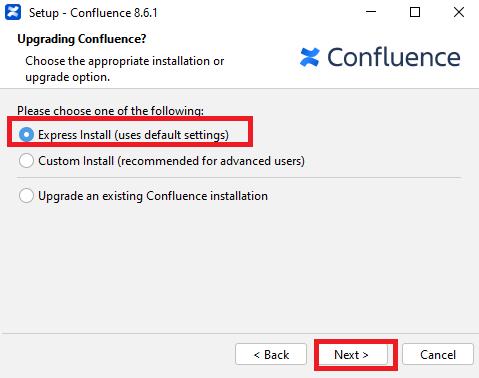
- Step 4: Choose the ‘Express Install’ option and continue by clicking on ‘Next.’
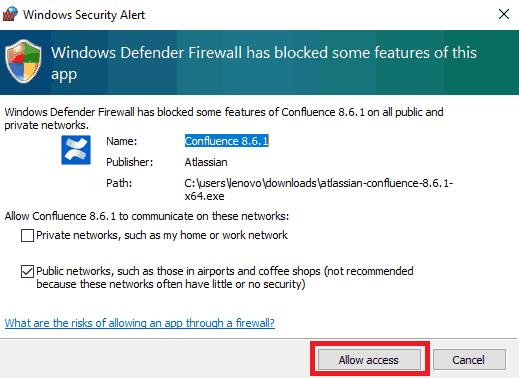
- Step 5: The Windows security pop-up may appear. Select the ‘Allow access’ option so that the confluence can access the Network.
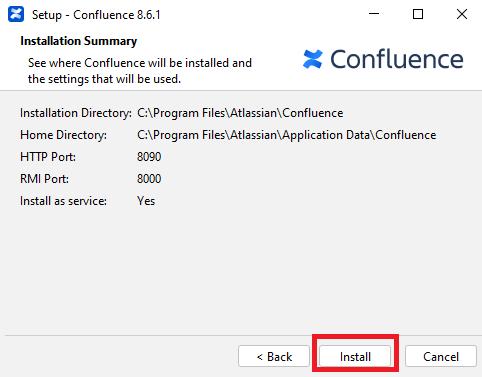
- Step 6: Now, click on the ‘install’ button.
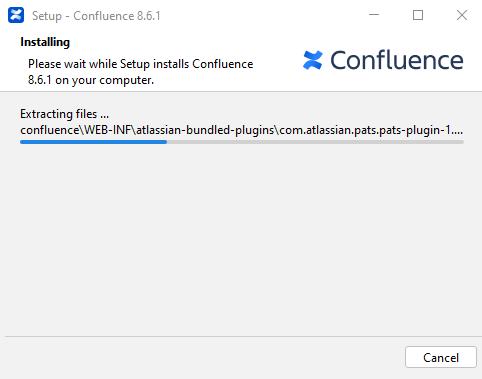
- Step 7: The installation starts as shown below.
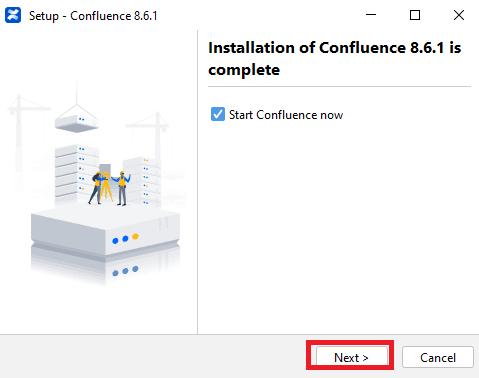
- Step 8: Keep the ‘Start Confluence’ option checked and select ‘Next.’
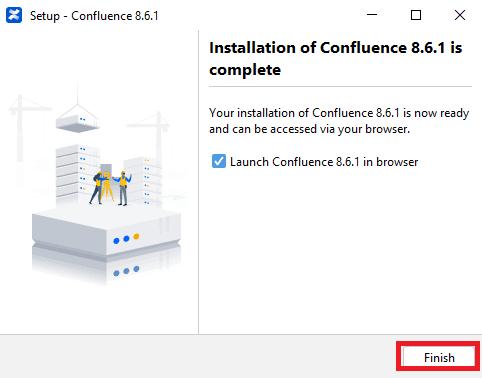
- Step 9: Now, mark the launch option as selected and click on the ‘Finish’ button.
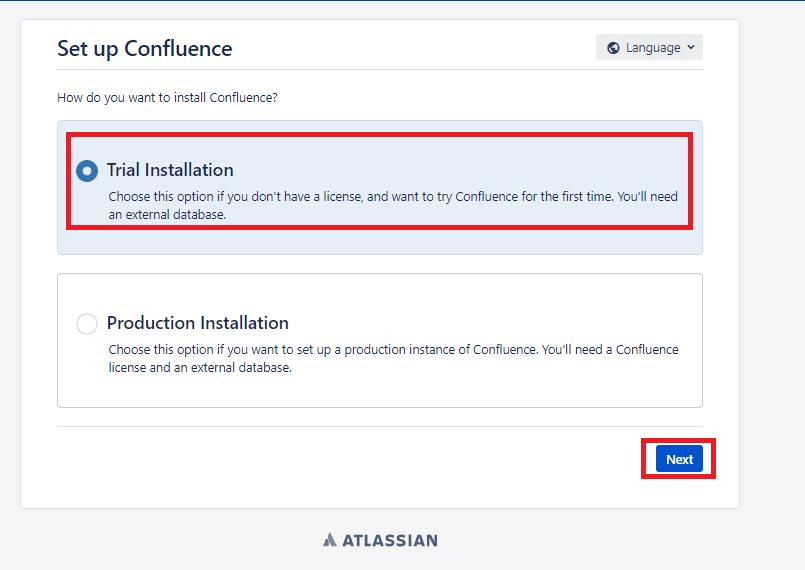
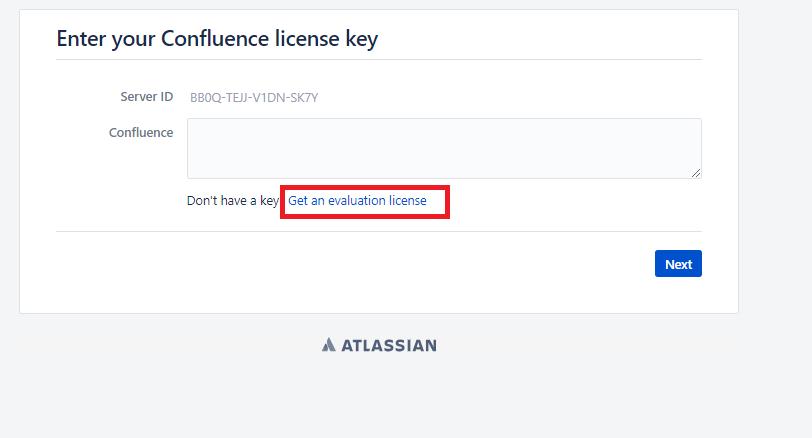
- Step 10: The Confluence home screen appears on the browser as shown below. Select ‘Trial Installation’ and click ‘Next.’
- Step 11: Now, select ‘Get the evaluation license’ to obtain the trial license for Confluence.
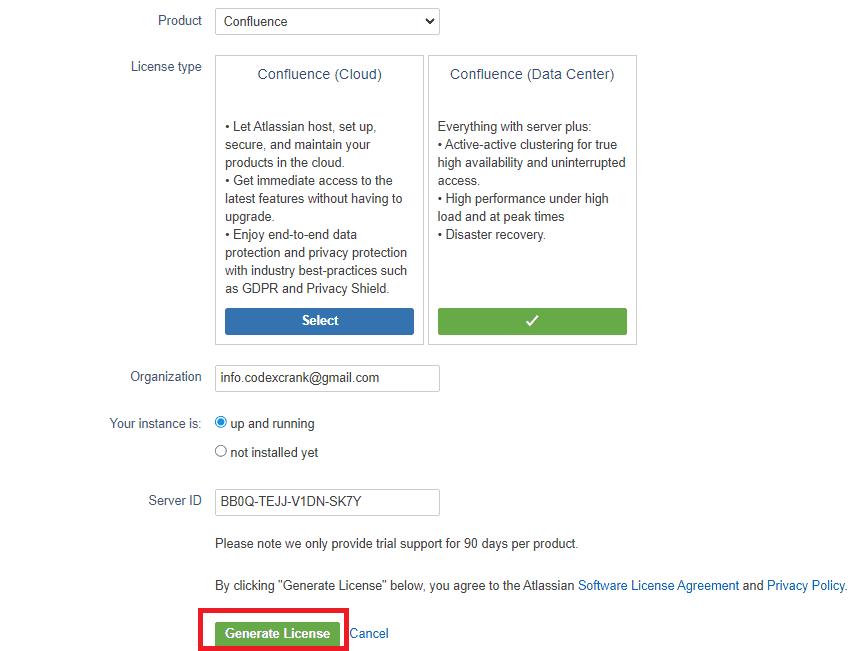
- Step 12: Keep the default options selected and click the ‘Generate License’ option.
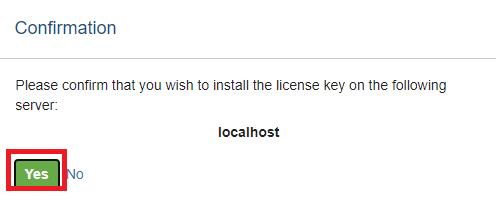
- Step 13: Now, click on the ‘Yes’ option to confirm installing the license key.
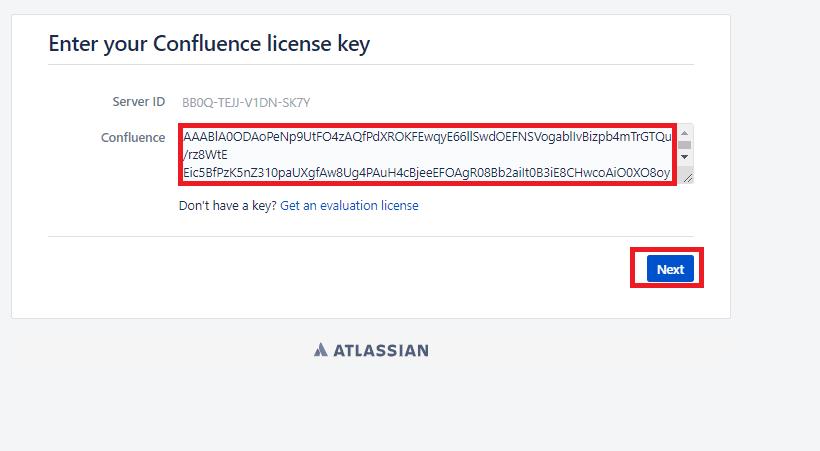
- Step 14: The license key appears in the text area. Click on ‘Next.’
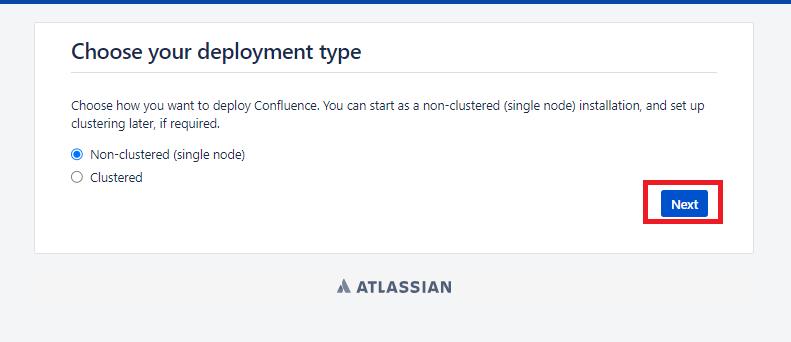
- Step 15: Select the ‘Non-clustered’ mode and click ‘Next.’
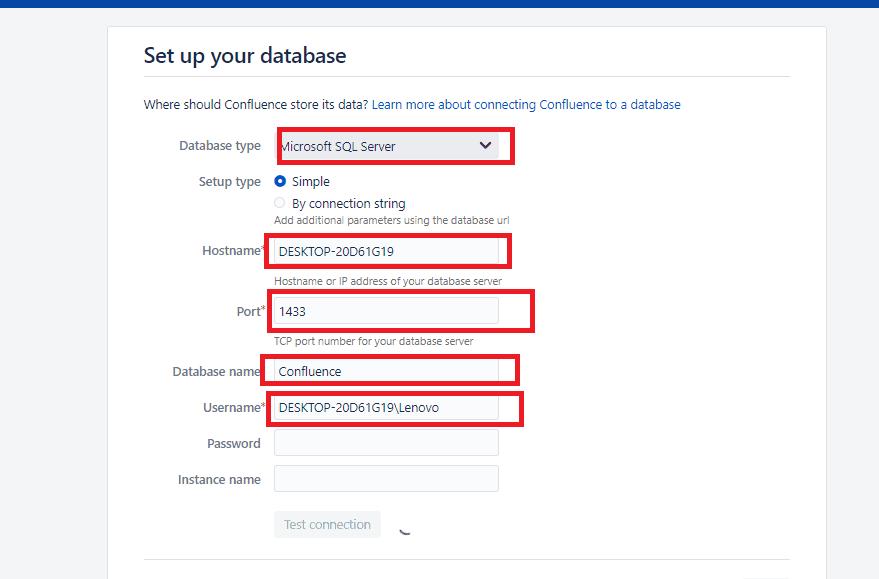
- Step 16: Enter the details of the database server instance that we created in the previous section. Then, click ‘Next.’
- Step 17: After the Confluence setup is done, the message appears as illustrated below.
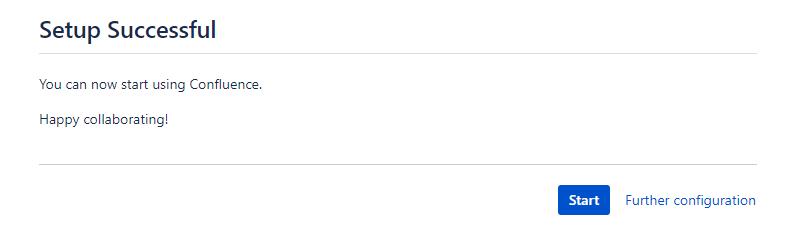
Thus, Confluence has been successfully installed on our Windows Platform.
Frequently Asked Questions
1. What is the Whiteboard Feature of Confluence?
It is a beta feature of Confluence that allows us to visualize the work within the workspace. It has features such as shapes, voting, timers, etc. to make the workspace visually more appealing.
2. What is the pricing of Confluence?
Confluence is available as Free, Standard, Premium, and Enterprise plans. The free plan supports up to 10 users and 2 GB of file storage. The pricing for the Standard plan starts at $60.50 per month and the Premium Plan at $115.5 per month. You can visit https://www.atlassian.com/software/confluence/pricing for more detailed information about the pricing.
3. Do I need to install Java and Tomcat before installing Confluence?
No, the Apache Tomcat application server and Java are bundled in the Confluence distribution. But, if you want to install an archive version of Confluence you need to install the supported Java version. You should visit the official documentation for Java configuration at https://confluence.atlassian.com/doc/installing-java-for-confluence-144212101.html.
4. What is the Confluence Data Center?
Confluence Data Center Hosting is a self-managed service that comes up with a custom configuration as per the organization’s requirement and complete control over the environment. The pricing for the Data Center plan of Confluence is $27,000 per year.
5. Does Confluence support the Technical Documentation feature?
Yes, Confluence helps us to create the documentation easily with multiple macros. We can also reuse the existing content through the inclusions library provided by Confluence. Additionally, we can also manage the versions of the document to track the changes.
Conclusion
Confluence enables us to manage projects of small as well as large size with efficient workspace collaboration. It allows us to integrate with Jira and other platforms to effectively build the team culture and keep the various stakeholders updated with the project’s progress. Thus, we can also manage the project’s timeline. After successfully installing Confluence on Windows, you have gained sufficient information to get started with the workspace management using Confluence. Go ahead and get your team collaboration aligned in a perfect way to manage the project.
 On-Job Support Service
Online Work Support for your on-job roles.

Our work-support plans provide precise options as per your project tasks. Whether you are a newbie or an experienced professional seeking assistance in completing project tasks, we are here with the following plans to meet your custom needs:
- Pay Per Hour
- Pay Per Week
- Monthly
| Name | Dates | |
|---|---|---|
| Confluence Training | Jul 18 to Aug 02 | View Details |
| Confluence Training | Jul 21 to Aug 05 | View Details |
| Confluence Training | Jul 25 to Aug 09 | View Details |
| Confluence Training | Jul 28 to Aug 12 | View Details |

Madhuri is a Senior Content Creator at MindMajix. She has written about a range of different topics on various technologies, which include, Splunk, Tensorflow, Selenium, and CEH. She spends most of her time researching on technology, and startups. Connect with her via LinkedIn and Twitter .


