Using another tool, such as VisualBasics, you can perform calculations and keep results in variables, right? However, such is not the case with PowerApps. With a change in input data, PowerApps ends up recalculating the formulas. Thus, you will not have to create and update variables each time.
But what exactly do you mean by variables in PowerApps? While most people are familiar with the capabilities that PowerApps hold, not everybody knows about its variables. Having said that, this article takes you through the basics of PowerApps variables along with their benefits and types.
PowerApps Variables - Table of Contents
- What is Microsoft PowerApps?
- Advantages
- What are PowerApps Variables?
- Types of PowerApps Variables
- Create and Remove PowerApps Variables
- Variable Lifetime and Initial Value
- Reading Variables
- FAQs
What is Microsoft Power Apps?
PowerApps is a suite of connectors, apps, services, and a data platform that offers a quick development environment wherein you can build custom apps to fulfill your business requirements.
Using this suite, you can instantly develop custom business apps that connect to the stored data in the underlying data platform and several on-premises as well as online sources, such as SharePoint, SQL Server, Microsoft 365, Dynamics 365, and more.
| If you want to enrich your career and become a professional in Microsoft PowerApps, then enroll in "PowerApps Online Training". This course will help you to achieve excellence in this domain |
Advantages of PowerApps
Below are some of the significant benefits offered by this suite:
- It provides a bespoke solution to tackle and solve various business challenges.
- You can easily leverage the smart mobile functionality of PowerApps to capture videos, signatures, pictures, and complete forms.
- Anyone can develop an app using PowerApps, even if they are not from a technical background and don’t know how to code.
- The PowerApp platform can be integrated with varying Microsoft tools and applications (Excel, SharePoint, Dynamics 365, and more) along with more third-party apps and services.
[ Learn The Complete PowerApps Tutorial ]
What are PowerApps Variables?
Basically, a PowerApps variable is one temporary storage that can be used and defined anywhere in the app. These variables can be typed and created by default when displayed in the functions that define their values. Typically, there are three types of PowerApps variables, such as global variables, context variables, and collections.
Types of PowerApps Variables
In PowerApps, there are three types of variables that you can find, such as:
Type #1. Global Variables
These are the single-row variables available in PowerApps. They are almost identical to the global variables available in diverse programming languages. Global variables, generally, are capable of holding almost any value, such as a boolean, text string, record, number, table, and the like. The scope of these variables is in the app itself. Thus, you can effortlessly use global variables on all the screens of the app.
The syntax of this variable is:
Set(variable, value)To create this variable type, you will have to run the below-mentioned function:
Set (global_variable, “Example”)Here:
- global_variable = name of the variable
- “Example” = value of the variable
If you wish to store a record in this variable type, you can do so by this function:
Set (varGlobalRecord, {User: “ABC”, ID: “123456”})If you wish to set multiple global variables, you will have to use different Set() functions, as it is impossible to define multiple variables in a single Set() command.
Set (varGlobalOne, “One global variable”)
Set (varGlobalTwo, “Two global variable”)
If you wish to delete the global variables, you will not be able to do that. Thus, to clear the variables, you will have to set the variable value through the Blank() function:
Set (GlobalVar, Blank() )Creating a Global Variable
To create a global variable in PowerApps, follow these steps:
Step 1. To begin with, choose Canvas App as the PowerApps type.
Step 2. Give a name to the app as GlobalVariable and select the Tablet format.
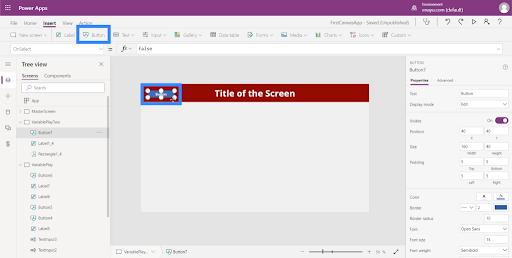
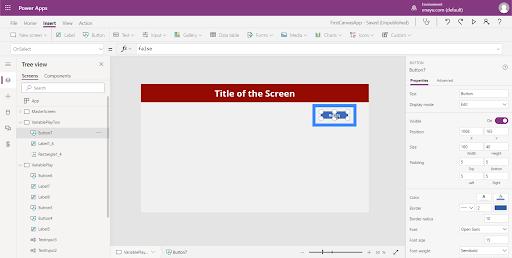
Step 3. Add a button, text input, and a label from the Insert table.
Step 4. In OnSelect, choose the button and edit the formula:
Set(Global_Variable, FirstInput.Text)
Step 5. Next, select the label field and edit the formula in the text field.
Step 6. If you wish to check all global variables available in PowerApps, visit File and choose Variables.
Step 7. The screen will display all the global variables.
Step 8. If you wish to verify references, click on the variable, and it will display the place where the variable’s definition exists and where it will get used.
[ Related Article: PowerApps Components ]
Type #2. Context Variables
In PowerApps, context variables are much like parameters that you pass to the methods in other programming languages. These variables could be referenced via one single screen. Their scope is within the screen.
The syntax of this variable is:
UpdateContext ({contextvariable: “Example”})To create one context variable, you will have to follow the below-mentioned function:
Update Content ({context_variable: “Example”})Here:
- context_variable = name of the variable
- “Example” = variable’s value
Keep in mind that you are wrapping these variables in curly braces wherein you must give a name for the variable, which should be followed by a colon along with the real value of this variable. The String’s value should always get wrapped in quotation marks.
Wish to make a career in the world of PowerApps? Sign up for this online PowerApps Training in Hyderabad to enhance your career!
Whenever you would wish to store a record in a context variable, you will have to wrap its value in other curly braces where you should give a name to the column, a colon, and the value of the column.
Update Context ({context_variable: {UserName: “XYZ”, ID: 123456}})By using a user() attribute, you can also store a predefined record in context variables with ease.
Update Context ({contextVariableRecord: user()})
If you wish to access a specific property from the record, you can call the variable followed by a dot and the property.
varUser.UserNameAt a time, you can set multiple variables by using a comma to separate all of them in the curly braces.
Update Context ({context_variableA: “One”, context_variableB: “Two”})To clear a context variable, you will have to set the value of the variable through a Blank() function.
Update Context ({LocalVar, Blank()})Creating a Context Variable
To create a context variable in PowerApps, follow these steps:
Step 1: Choose the Canvas App from blank as the type of PowerApps.
Step 2: Now, give the name of the app as ContextVariable and select the Tablet format.
Step 3: Add a button, text input, and a label from the Insert table.
Step 4: Choose the button and edit the formula in OnSelect.
Step 5: Update Context({context_variable:FirstInput.Text})
Step 6: Next, select the label field and edit the formula in the text field.
Step 7: To check all of the context variables, visit the File section and choose the variables.
Step 8: Your screen will display all the available variables in the app.
Step 9: If you wish to verify them, choose the screen, and you will see the definition of existing variables along with where they will get used.
Step 10: The app will update the variable’s value as you have entered it in the text field and showcase the same accordingly in the label.
Type #3. Collections
In PowerApps, collections are such variables that get used to store tables and can be referenced in the app. They are known as the multi-row valued variables. You can see them as arrays or tables. The scope of these variables is in the app. Thus, you can use them anywhere in the PowerApps.
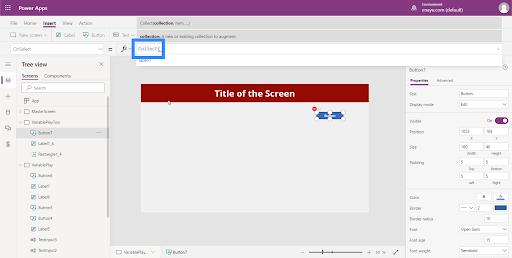
To create a collection variable, follow this function:
Collect (collect_variable, “Example”)Here:
- collect_variable = name of the variable
- “Example” = variable’s value
You can set the collection through ClearCollect() function. It can also be used to clear out the entire content if it has been defined already.
ClearCollect (CollectionCol, {UsernName: “XYZ”, email: “xyz@gmail.com”})Here:
- CollectionCol = name of the collection
- Rows are put inside the curly braces. Keep in mind that every column should have an email ID and a name. Also, the values, such as “XYZ” and “xyz@gmail.com” should be put in double quotes.
If you wish to add multiple rows to the collection variable, you should separate them with a comma, and the next row should come in the curly braces.
ClearCollect (CollectionCol,
{Username: “XYZ”, email: “xyz@gmail.com”},
{Username: “DEF”, email” “def@gmail.com”}
)
You can also store an already-defined record in the row with the user() attribute.
ClearCollect (CollectionCol, user())To remove a row, you can use RemoveIf() attribute.
RemoveIf (UserCol, email - ThisItem.email)Creating a Collection Variable
To create a collection variable, follow these steps:
Step 1: Choose the Canvas app from blank as the type of PowerApps.
Step 2: Give a name to the app as Collection Variable and select the Tablet format.
Step 3: Go to the insert table and add two buttons, five text inputs, and a data table from there.
Step 4: Next, choose the button and select the formula in OnSelect.

Step 5: Edit the text to Submit the Collection.

Step 6: Collect(formData Temp, {name:InputText1.Text, temp1:InputText2.Text, temp2:InputText3.Text, temp3:InputText4.Text, temp4:InputText5.Text})

Step 7: Now, select the Data table and edit the formula in the Items field.
Step 8: To clear data, select the second button and edit the text to clear the data, and edit the OnSelect field with clear(formDataTemp).
Step 9: If you wish to verify the collection variables, visit File and click Collections, and it will display collection variables available in the app.
Step 10: On the screen, you will see the initial five items from the collections variable.
Step 11: The app will update the variable’s value as put in the text field and display the same in the data table.
[ Check out PowerApps Lookup ]
Create and Remove PowerApps Variables
All of the PowerApps variables get created completely whenever they appear in a ClearCollect, Set, Collect, UpdateContext, or Navigate function. To declare one variable along with its type, you will have to include it in any of the functions anywhere inside the app. However, remember that none of the above-mentioned functions can create variables. Rather, they will simply fill variables with respective values. Thus, you will not be able to declare variables as explicitly as you can in any other programming tool.
Let’s take an example here to understand it better. Suppose you have a button control that comes with an OnSelect formula equal to Set(X,1). This formula straightforwardly makes it clear that X is variable and 1 is a type of number. You can use this X in formulas in the form of a number. This way, the variable will have a “blank” value before you have selected the button but after you have opened the app. When you choose the button, you give X the value of 1.
Suppose you added some other button and set the OnSelect property to Set(X, “Hi”). Now, you will see an error as the text string (type) is not matching the type in the previous set, which was a number string. Thus, you must remember that every implicit definition of the variable agrees with the type. This happened because you put X in formulas and not because none were actually running.
You can remove a variable by removing all the ClearCollect, Set, Collect, UpdateContext, or Navigate functions that directly establish the variable. In the absence of these functions, no variable can exist. Also, you must delete references to the variable as they will create an error.
Variable Lifetime and Initial Value
When the app runs, all variables get stored in memory. Once the app closes, the values for those variables get lost. However, with the help of Collect or Patch functions, you can store the variables’ contents in a data source.
Not just that, you can even store these values in collections on any local device with the help of the SaveData function. Whenever a user opens the app, all the variables will show a blank initial value.
| Check out the Top PowerApps Interview Questions and Answers that help you grab high-paying jobs |
Reading Variables
You can use the variable's name to read the value. For instance, you can easily define a variable by using this below-mentioned formula:
Set (X, 1)And then, you can use “X” anywhere you can use a number, and it will get replaced with “1”.
Pi () * Power (X, 1)If you provide the same name to a context variable as you do with a collection or a global variable, the context variable will take precedence. But, you can still take reference from the collection or global variable by using the disambiguation operation [@X].
| Looking for Best PowerApps Online Training Platfrom in Bangalore? To Enroll a Free Demo Click Here. |
PowerApps Variables FAQs
1. What are the variables in PowerApps?
Simply put, a variable is a temporary storage that you can define and use anywhere in PowerApp.
2. How do you use variables in PowerApps?
All the PowerApps variables get created implicitly when they appear in a ClearCollect, Set, Collect, UpdateContext, and Navigate function.
3. How do you set a variable value in PowerApps?
Using the Set function, you can easily set a variable value in PowerApps. For instance, if you have added Set(MyVariable, 100), the MyVariable variable will simply have a value of 100.
4. What is the PowerApps collection variable?
Collection variables are a bit more complex than the other two variables. Generally, they hold the power to store diverse items at a single time.
Wrapping Up
Now that you have understood the concept of PowerApps variables through the information mentioned above, it will be a breeze to develop a fully-functional app to meet your business requirements. So, without further ado, find out more details about PowerApps variables and get started today.
Besides, if you are just getting started and would like to learn the ins and outs of PowerApps, participate in this PowerApps Training Course by MindMajix today. The course includes 18 hours of sessions, 15 hours of labs, a free demo on request, 24/7 lifetime support, one-on-one doubt clearing, a certification-oriented curriculum, real-time project use cases, and more.
If you have any doubts, reach out to us in our MindMajix Community
 On-Job Support Service
Online Work Support for your on-job roles.

Our work-support plans provide precise options as per your project tasks. Whether you are a newbie or an experienced professional seeking assistance in completing project tasks, we are here with the following plans to meet your custom needs:
- Pay Per Hour
- Pay Per Week
- Monthly
| Name | Dates | |
|---|---|---|
| PowerApps Training | Feb 07 to Feb 22 | View Details |
| PowerApps Training | Feb 10 to Feb 25 | View Details |
| PowerApps Training | Feb 14 to Mar 01 | View Details |
| PowerApps Training | Feb 17 to Mar 04 | View Details |

Viswanath is a passionate content writer of Mindmajix. He has expertise in Trending Domains like Data Science, Artificial Intelligence, Machine Learning, Blockchain, etc. His articles help the learners to get insights about the Domain. You can reach him on Linkedin


