- About QlikView Scripting & Qlikview Hidden Scripts
- QlikView Circular Reference
- OLE DB/ ODBC Connection to Qlikview Data Sources
- Best Practices for Data modelling in QlikView
- Definition And Advantages of QVDs in QlikView
- How to Fix Circular References & Remove Synthetic Tables
- Concatenating Two Tables in QlikView
- Creating Data Islands in QlikView using Data Source
- Optimize QlikView Application User Interface
- Learn SET Analysis Syntaxes, Examples in QlikView
- QlikView Table Viewer - Previews Records
- Process of Incremental Load in QVD QlikView
- QlikView Architecture
- Binary Load in QlikView
- QlikView Bubble Chart
- QlikView Data Transformations in Flat Files
- Intervalmatch Function in Qlikview
- QlikView Interview Questions
- Qlikview Management API
- Qlikview Mapping
- QlikView Metadata
- QlikView Tutorial
- QlikView vs Qlik Sense
- Color Alerts and Calculated Colors In QlikView Scripting - QlikView
- How Debugging works in QlikView Script Debugger
- Rename Field and Qualify in Qlikview
- Script Editor Features and Commands in QlikView
- Script Expressions & Quotation marks in Qlikview
- Qlikview Scripting Features and Functions
- Star schema and Snowflake schema in QlikView
- Synthetic keys in QlikView
- Table Viewer in QlikView
In Qlikview, we can rename the name of the existing fields for developing the relations among the data fields, and this process is called renaming fields. In QlikView, Data Fields are utilized as the main identifying factor for developing data associations. For Renaming the fields we use different methods like “Qualify” Statement, “Rename Field” Function. The QlikView Qualify Statement renames the data fields and delinks the links present between them. Through the given examples, you can understand how Field Renaming happens in Real-Time.
| In this blog, we will discuss the following topics: |
What are Renaming Fields?
Renaming Fields is a process of changing the names of the existing fields. Through renaming fields, we will link the data fields accurately. By Renaming Field names, we can delink the data fields.
| Want to Become an Expert in QlikView? Then visit here to Learn QlikView Training Online. |
Renaming Fields using Qualify Statement
QlikView Qualify Statement is used for changing the provision of field names; field names will fetch the table name as an affix.
Syntax:
Qualify *field_list
The automatic join between the fields is interrupted through the Qualify Statement. Qualify Statement Qualifies the data field name with its corresponding table. The names of the data fields are renamed, and the new names will be in the format “table name.newname”.
table name is the same as the label of the current table.
| Related Article: Interval Match in Qlikview |
We can understand the Qualify Statement in -detail through the following example:
We will create a table with the name “IT”
|
ID | Course_Name | Price |
| 1 | Python | 8,000 |
| 2 | Java | 11,000 |
| 3 | .Net | 13,000 |
| 4 | Web Designing | 10,000 |
Now we will create another table and name it as “Non-IT” .
| ID | Course_Name | Price |
| 1 | Autocad | 12,000 |
| 2 | VLSI | 16,000 |
| 3 | Embedded Systems | 15,000 |
| 4 | Digital Marketing | 20,000 |
Now we will load the data into the Script
Qualify *;
IT:
LOAD[ID],
Course_Name,
Price
FROM
Qualify1.xlsx
(ooxml, embedded labels, table is IT);
Qualify *;
Non-IT:
LOAD[ID],
Course_Name,
Price
FROM
Qualify1.xlsx
(ooxml, embedded values, table is Non-IT)
Output:
|
IT.ID |
|
1 2 3 4
|
| IT.Course_Name |
|
Python Java .Net Web Designing |
| IT.Price |
|
8,000 11,000 13,000 10,000 |
|
Non-IT.ID |
|
1 2 3 4 |
| Non-IT.Course_Name |
|
Autocad VLSI Embedded Systems Digital Marketing |
| Non-IT.Price |
|
12,000 16,000 15,000 20,000 |
Visit here to learn QlikView Training in Bangalore
If we did not use the Qualify statement, QlikView will map both tables as follows:
| ID |
|
1 2 3 4 |
| Course_Name |
|
Python Java .Net Web Designing Autocad VLSI Embedded Systems Digital Marketing |
| Price |
|
8,000 11,000 13,000 10,000 12,000 16,000 15,000 20,000 |
Merging of the tables worked for “ID” Field and for “Course_Name” and “Price” fields did not work.
We can solve this problem by Qualifying the fields that we don’t need to get associated with.
Qualify Course_Name,
Price;
IT:
LOAD[ID],
Course_Name,
Price
FROM
Qualify1.xlsx;
(ooxml, embedded labels, table is IT);
Qualify Course_Name,
Price;
Non-IT:
LOAD[ID],
Course_Name,
Price
FROM
Qualify1.xlsx;
(ooxml, embedded labels, table is Non-IT);
Output:
| ID |
|
1 2 3 4 |
| IT.Course_Name |
|
Python Java .Net Web Designing |
|
Non-IT.Course_Name |
|
Autocad VLSI Embedded Digital Marketing |
|
IT.Price |
|
8,000 11,000 13,000 10,000 |
|
Non-IT.Price |
|
12,000 16,000 15,000 20,000 |
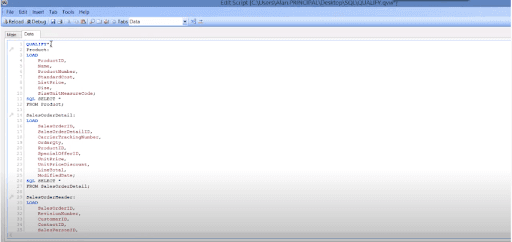
In the below screenshot, we can see how Qualify Statement is used in the QlikView Script:

Renaming Field Names using AS Specifier
The AS Specifier is used in the Load statement, and we can see it in the following query:
Load ID as CustomerID, Name, Address, Phone.no, State from Customer.csv;
In the above query, we used AS Specifier to rename the “ID” Field as “CustomerID”.
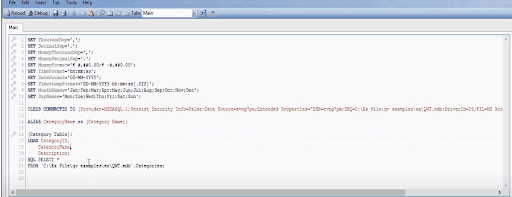
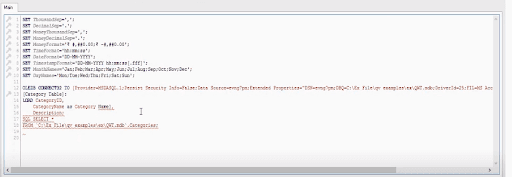
In the below screenshot, we can see how AS Specifier is used to Rename the fields.
Rename Field Names using Alias Statement
We can rename the data fields using the Alias Statement, and Alias Statement Predates the LOAD Statement.
Example:
Alias ID as CustomerID;
Load * from Customer.csv;
In the above example, the data field from the data source “Customer.csv” with the name “ID” is renamed as “CustomerID”. This is used for creating the links with tables.

[Related Article: QlikView Metadata]
Renaming Fields using “Rename Field” Function
The Rename Field function is used to rename the fields.
Example:
Rename Field ID to CustomerID;
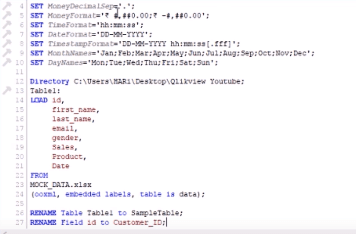
In the below screenshot, we can see how Rename Field function is used in the QlikView Script:

| Explore QlikView Sample Resumes! Download & Edit, Get Noticed by Top Employers! |
Conclusion
There are many methods to rename the existing fields for building data associations. QlikView Qualify statement is a widely used method by the practitioners for renaming the fields. I hope this article provides you with the required information about Renaming the data fields.
If you have any queries, let us know by commenting in the below section.
 On-Job Support Service
Online Work Support for your on-job roles.

Our work-support plans provide precise options as per your project tasks. Whether you are a newbie or an experienced professional seeking assistance in completing project tasks, we are here with the following plans to meet your custom needs:
- Pay Per Hour
- Pay Per Week
- Monthly
| Name | Dates | |
|---|---|---|
| QlikView Training | Feb 24 to Mar 11 | View Details |
| QlikView Training | Feb 28 to Mar 15 | View Details |
| QlikView Training | Mar 03 to Mar 18 | View Details |
| QlikView Training | Mar 07 to Mar 22 | View Details |

Viswanath is a passionate content writer of Mindmajix. He has expertise in Trending Domains like Data Science, Artificial Intelligence, Machine Learning, Blockchain, etc. His articles help the learners to get insights about the Domain. You can reach him on Linkedin


