
- Advanced OpenStack Tutorial
- Configuring Account Server - Openstack
- OpenStack Object Storage Tutorial
- OpenStack Interview Questions
- OpenStack Tutorial
- Attaching volumes to an instance – OpenStack
- Automating OpenStack Installations of Opscode Chef Server and Chef Client - OPENSTACK
- Automatically assigning and modifying fixed networks of tenants – OpenStack
- Checking OpenStack Services
- Configuring Object Server - OpenStack
- Configuring OpenStack Compute for Cinder volume - Openstack
- Creating containers - Openstack
- Creating and Deleting a Neutron network – OpenStack
- Creating an external Neutron network – OpenStack
- Creating and Managing Keypairs - OpenStack
- Creating an OpenStack Object Storage sandbox environment
- Creating a sandbox Compute server with VirtualBox and Vagrant - OpenStack
- Creating a sandbox Network server for Neutron with VirtualBox and Vagrant – OpenStack
- How to Create the Service Tenant and Service Users - Openstack
- OpenStack – Detaching volumes from an instance
- Downloading objects In OpenStack
- Configuring OpenStack Keystone user & Role Management - OpenStack
- How to Configure Ubuntu Cloud Archive in OpenStack
- How to Create Sandbox Environment for the OpenStack
- Create Tenant Users and Roles in OpenStack
- Install and Configure Compute Node – OpenStack
- How to Install Compute Controller Services – OpenStack
- Installing and configuring OVS and API server for Neutron - OpenStack
- Installing and setting up Pacemaker and Corosync - Highly Available OpenStack
- Managing Images with OpenStack Image Service
- Manually associating and dissociating floating IPs of instances – OpenStack
- Monitoring Compute services with Munin – OpenStack
- Monitoring OpenStack services with Nagios
- OpenStack Networking
- Registering a remotely stored image – OpenStack Cloud
- OpenStack – Removing nodes from a cluster
- Setting up a Chef Environment for OpenStack
- Troubleshooting OpenStack
- Troubleshooting OpenStack Authentication and Networking
- Troubleshooting OpenStack Compute Services
- Uploading Large Objects In OpenStack
- Using OpenStack Dashboard to Launch and Terminate Instances
- Using OpenStack Object Storage
- Starting OpenStack Block Storage
- Stopping and starting Nova services - Openstack
- Why OpenStack is Popular?
OpenStack is an open-source framework that makes cloud computing easier with its wide variety of software tools and virtual servers. The OpenStack platform helps in controlling a diverse array of resources in a data hub that is used for managing both private and public clouds. The computing, storing, and communicating activities in an OpenStack framework are carried out by deploying VMs and other instances through a dashboard, also known as Horizon. We’ll learn more about how to install the OpenStack dashboard in the subsequent paragraphs.
Openstack Dashboard Overview
The OpenStack Dashboard (Horizon) is an interface that is used by both OpenStack administrators and users. The interface of the OpenStack dashboard works with a number of OpenStack services viz. Nova, keystone, swift, etc., through a number of OpenStack APIs.
| If you would like to become an OpenStack Certified professional, then visit Mindmajix - A Global online training platform: " OpenStack Certification Training Course ". This course will help you to achieve excellence in this domain. |
The features of the Dashboard that an administrator can get are primarily Initiation of Virtual Machine instances, viewing size, status, and current condition of any OpenStack cloud deployment, managing of cloud resources available to end-users, etc. For an end-user, the OpenStack Dashboard mainly works as a portal to access cloud resources within the threshold set by the admins.
Here’s what the main page of the dashboard looks like when logged in as an administrator:

Here’s what the main page of the dashboard looks like when logged in as an end-user:

Installation of OpenStack
Here, we will discuss the installation of OpenStack on a single node in CentOS 7. Below are the steps to follow to complete your installation process.
- The first step towards the installation of OpenStack is to enable virtualization that can easily be done either by creating a virtual machine on your VMware or using the Oracle VM VirtualBox.
- Before beginning the installation, login with your root account in the CentOS 7 terminal and run the below commands to configure the network.
- systemctl disable firewalld
- systemctl stop firewalld
- systemctl disable NetworkManager
- systemctl stop NetworkManager
- Systemctl enable network
- Systemctl start network
- Once network is configured, install OpenStack with a tool called pack stack provided by rdo repository. Installing all the OpenStack services one by one, configuring and connecting them can take a lot of time. So, it is always advisable to use tools like packstack, which uses puppet manifests that contain all the information required to install and configure your services. So it'll do it automatically. However, if you want to install OpenStack for any tailormade configuration then all the key services need to be installed one by one and configured as per requirement. In the subsequent steps, we’ll see how to install OpenStack with packstack. Let us consider the installation of the Newton version of OpenStack.
- Run the below command
yum install -y centOS release - openstack - newton - Once done, clear screen and update packages with the below command
yum update -y - Once done, install packstack with the below command
yum install -y openstack -packstack - Once packstack is installed, this can be used to configure all the key services you are going to use in your VM
- Run the below command to install and configure all the key services of OpenStack like Nova(compute), swift(object storage), Cinder(block storage), neutron(networking), glance(image), Horizon(dashboard) etc.
packstack --allinone - Upon successful completion of the installation, the installer will display information about the login credentials required to log in to the dashboard. The username and password will be stored in the keystonerc_admin file.
- Login to the dashboard (Horizon) using the credentials provided in the keystonerc_admin file
| Related Article: OpenStack Network |
Note: In case of an error in the installation of packages using packstack, you can refer to the answer file (an xml based file created by packstack that contains all the setup and configuration details of your OpenStack installation.)
packstack --answer -file =/root/answers.txtThe below image shows the terminal window on completion of OpenStack installation.>

Using the OpenStack Dashboard
Once the OpenStack Dashboard is installed successfully, we need to know how to work with the various features of the dashboard. The subsequent sections will discuss the primary factors to be known in order to access the OpenStack Dashboard and work with it.
| Related Article: OpenStack Block Storage |
How to access OpenStack Dashboard?
Once OpenStack is installed successfully in the VM, we will have to access the Dashboard. Steps to access OpenStack Dashboard are as follows.
- Open the keystonerc_admin file using the below command
cat keystonerc_admin - Once the above command is executed, the user id, password and IP address of the dashboard is displayed(Refer to below image).
- Once the above command is executed, the user id, password and IP address of the dashboard is displayed.

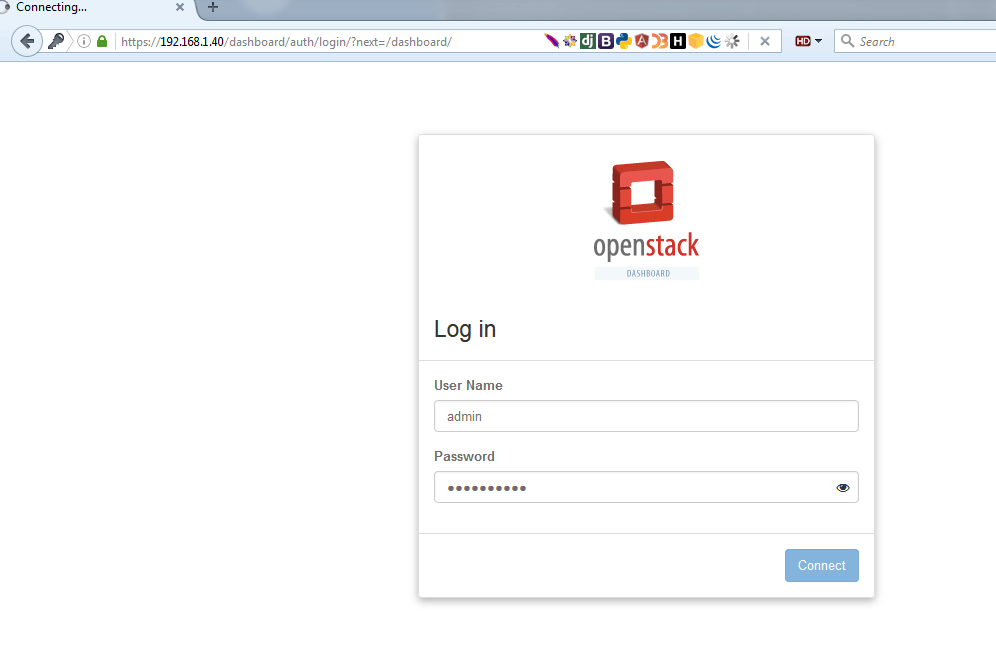
- Open your browser and launch the dashboard using the IP address displayed in the last step.
| Related Article: OpenStack Authentication |
Eg: 10.0.2.15/dashboard
Note: Javascript and cookies should be enabled in your browser
- Provide the username and password displayed in the terminal and click “Connect”

Source: https://www.tecmint.com/wp-content/uploads/2016/04/OpenStack-Login-Dashboard.png
Exploring the Dashboard(Horizon)
Based on the user role, the interface and functions of the dashboard vary. When logged in as an administrator, the dashboard offers two primary tabs - Project and Admin. As an end-user, only one tab will be visible - Project. In the subsequent sections, we shall see the key aspects of these tabs present in the OpenStack Dashboard.

- OpenStack Dashboard - Admin Tab
The Admin Tab is used to view the size and current usage of any cloud deployment, set threshold for end-users, manage cloud instances, images, flavors, volumes, networks, and many more. The Admin tab contains a list of sections. Let us see the function of the key sections below.
| Related Article: Advanced Openstack |
|
The key section in the Admin tab |
Function |
|
Overview |
Gives the basic reports like RAM size, usage summary, volume storage, etc. |
|
Resource Usage |
Shows various usage reports like the Daily Report, Stats, etc. |
|
Hypervisors |
Gives the hypervisor (Virtual Machine Monitor) summary report. |
|
Host Aggregate |
Allows admins to create and update host aggregates by grouping hosts together and viewing details of Availability Zones(AZ). AZs are the metadata information for partitioning a cloud and this is visible to end-users as well. |
|
Instances |
Displays the running instances and allows admins to pause, resume, suspend, restart, reboot, and remove the same. |
|
Flavors |
Flavor defines the memory and storage capacity of an instance. The flavors tab helps the admin view, create, update, and delete flavors |
|
Volumes |
Volumes are blocks that can be attached or detached from an instance at any point in time. The Volume tab allows admins and users to view, add, update or delete any volume type. |
|
Images |
The images tab allows admins to get the list of images already available. It also allows the addition or removal of any custom image. |
|
Default |
Displays the default quotas of the available resources. |
|
System Information |
Gives current status of available OpenStack services. It has two sub-tabs - Compute Service and Block Storage Service |
|
Identity Panel |
The Identity Panel for an admin user comprises the following subsections.
|
- OpenStack Dashboard: Project Tab
An end-user gets access to the projects within the OpenStack dashboard. Within the project, a user can create, delete or update multiple instances. The project can broadly be classified under three heads - Compute, Network, Object Store, Orchestration. Let us see the key features of these sections
|
Project - Compute Tab |
Function |
|
Overview |
Displays summary of the project |
|
Instances |
Allows users to pause, resume, suspend, restart, reboot, and remove available instances. Also enables users to create a snapshot from instances |
|
Volumes |
Allows users to add, edit and delete volumes and volume snapshots |
|
Images |
Enables users to view or edit snapshots of instances, view public images, etc |
|
Access and Security |
This section contains the below subsections:
|
|
Project - Network Tab |
Functions |
|
Network Topology |
View the topography of network |
|
Networks |
Add, update, and manage networks. |
|
Routers |
Add or update subnets |
| Related Article: Creating a Sandbox Network Server for Neutron with VirtualBox |
|
Project - Object Store Tab |
Function |
|
Containers |
Containerization is the technique of isolating software processes from the underlying Operating System. The Containers section in the OpenStack dashboard helps users to create and manage containers |
| Related Article: Configuring Ubuntu Cloud |
|
Project - orchestration Tab |
Functions |
|
Stacks |
Used to manage multiple cloud applications and instances with the help of Restful APIs |
- Creating and Booting a VM Instance
Once OpenStack is installed and the dashboard is created, users need to create VM instances in the dashboard. Before starting the creation process of VM instance, we need to have the below 2 options available.
- SSH Key Pair should be available. If we have a key pair ready, we can import the same or we can create an SSH key pair for our VM instance. We will see how to create an SSH key pair in the following sections. The key pair is needed to enhance the security of your VM instance.
- External Network should be defined
How to create a VM Instance by using the OpenStack Dashboard?
Once the above-mentioned prerequisites are met, login to the dashboard and follow the below steps to launch your own VM instance in the OpenStack Dashboard.
- Click on Project
- Under the “Compute” section, click “Instances”
- On the top right corner, the “Launch Instance” button will be there. Click on this button to open the “Launch Instance” pop-up box.
- The Launch Instance pop (Image is added below) up that opens contains 3 basic tabs - Details, Access & Security, Networking. Apart from it, depending on the roles and services installed, it can also contain Post Creation and Advanced Options tabs
- In the Details tab, give a name to the VM Instance in the “Instance Name” text field. Give a descriptive name to your VM instance as this will be used as your VM hostname as well.
- Assign a flavor from the available drop-down list. Note that as you select any flavor, the details of the same get displayed in the right-hand section of the window. Select ‘Non-Global Zone’ if the OpenStack system is a kernel zone.
- From the “Instance Boot Source” drop-down, select Boot from Image. Note that the flavor and image should have some type of zone.
- Select an Image from the “Image Name” dropdown.

- Navigate to the “Access & Security” tab. The SSH key pair needs to be selected from here. We shall see how to create SSH key pair later.
- Go to the “Networking” tab. Select the network with which the VM instance needs to be attached.
- Once all the required options are selected, click the Launch button from the Details tab
- The new instance will be launched and you will be able to see a success message on the top right corner of the window.
- Click on the newly created VM Instance link to open the console log of the instance. All information about the instance will be present in the console log.
- You can create and update volumes, images, etc., for the instance from the respective tabs as per your requirement.
How to create an SSH Key Pair
By inserting an SSH key pair to a VM instance during its launch, stronger security is ensured to the VM instance. Let us see how to create an SSH key pair inside the OpenStack dashboard, below.
- After logging into the Horizon, connect to the correct project. (Project name is displayed on the upper right-hand corner of the screen).
- Open the Access & Security Page using the below navigation from the left panel
- Project -> Compute -> Access & Security
- Go to the Key Pairs tab. Here, you can either create a key pair or import an external key pair into the application.

- To create a key pair, click on the same button. Input a key pair name and click “Create key pair”.
- Once created, this new key pair gets listed in the Access & Security section.
- Ensure that the newly created key pair is automatically downloaded. Otherwise, users can also click on the link present to download the key pair. This file can be used for connecting from any outside machines.
- To import a key pair, again navigate to the Access & Security section from the dashboard.
- Access the Key pairs tab and click on “Import Key Pair”
- Add a key pair name and paste the public key and click on the “Import Key Pair” button.
- In order to attach the key pair to a VM instance, you need to choose the same from the Access & Security tab of the Launch Instance pop-up box. The Key Pair drop-down will list down all the available key pairs. You may also import an external key pair by clicking on the “+” button.
| Related Article: OpenStack Dashboard to Launch Instances |

How to Create a Network for a Tenant?
An OpenStack admin can provide a permanent network to end-users or grant them permission to create, connect, or delete networks. Such networks are known as Tenant Networks.
Quick steps to create a tenant network in the OpenStack Dashboard
- From the Manage Network section under Project, select “Create Network”
- Provide “network name”, “project”, “project network type” and other options in respective fields. After that, select or deselect the “Shared” / “External Network” options.
- Click on “Create Network”. A new tenant network will be created.
- From the Network panel, access the newly created network.
- Provide the required information in the Subnet and Subnet details tab. (like Subnet Name, Network Address, etc.)
- Click on the “Create button”
- Subnet should be created and listed in the network panel.
| Related Article: OpenStack Object Storage |
How to Associate a Floating IP Address with a Project
It is necessary to attach a floating IP to your VM instance to facilitate accessing private and public cloud networks. Floating IPs can be associated any time with the VM Instance right from the time of its creation. Typically, there will be a number of floating IPs available for users to pick and attach to their VMs. The Association of floating IPs to the VM instances facilitates connecting to these instances even from external networks. Let us see how to associate a floating IP with your VM instance at the time of the creation of the instance.
- Once the new VM instance is launched and the “Power State” shows as running, click on the “Create Snapshot” drop-down list and select “Associate Floating IP”.
- From the “Manage Floating IP Association” dialogue box that opens, select the relevant IP Address from the drop-down list.
- Select a port from the Port List
- Click on the “Associate” button to associate a floating IP to your VM instance.
Follow the below steps to add floating IP to your VM instance from the “Access & Security” section.
- Navigate to the Access & Security tab
- Click on the “Floating IPs” tab
- Select the appropriate IP address and click on the “Allocate IP to Project” button.
You can also allocate a floating IP to an instance from the “Access & Security” tab following the below steps.
- Navigate to the “Access & Security” section from the dashboard (Compute >Access & Security)
- From this section, open “Floating IPs” and select the “Allocate IP to Project” button.
- From the “Allocate Floating IP” window that opens, select the relevant floating IP from the drop-down list, and click on the “Allocate IP” button.
Conclusion
With the higher demand for open source tools and cloud computing in the current era, OpenStack holds a strong position in the global IT industry. The Horizon is a massive interface with a wide array of resources. The above article is written taking the Newton version of OpenStack into consideration and the key features of the OpenStack dashboard are covered in this content.
 On-Job Support Service
Online Work Support for your on-job roles.

Our work-support plans provide precise options as per your project tasks. Whether you are a newbie or an experienced professional seeking assistance in completing project tasks, we are here with the following plans to meet your custom needs:
- Pay Per Hour
- Pay Per Week
- Monthly
| Name | Dates | |
|---|---|---|
| OpenStack Training | Jul 25 to Aug 09 | View Details |
| OpenStack Training | Jul 28 to Aug 12 | View Details |
| OpenStack Training | Aug 01 to Aug 16 | View Details |
| OpenStack Training | Aug 04 to Aug 19 | View Details |

Ravindra Savaram is a Technical Lead at Mindmajix.com. His passion lies in writing articles on the most popular IT platforms including Machine learning, DevOps, Data Science, Artificial Intelligence, RPA, Deep Learning, and so on. You can stay up to date on all these technologies by following him on LinkedIn and Twitter.


