
- 6 Hot And In-Demand Tech Areas In 2024
- How To Forward Your Career With Cloud Skills?
- Top 7 On-Demand IT Certifications
- Most In-demand Technologies To Upskill Your Career
- Top 10 Hottest Tech Skills to Master in 2024
- Top Skills You Need to Become a Data Scientist
- Groovy Interview Questions
- Facets Interview Questions
- Crystal Reports Tutorial
- VAPT Interview Questions
- Flutter Tutorial
- Saviynt VS Sailpoint
- Flutter vs Xamarin
- PingFederate Interview Questions and Answers
- Dart vs Javascript : What's the Difference?
- Terraform Private Registry
- Cylance Interview Questions and Answers
- Sophos Interview Questions and Answers
- Top Camunda Interview Questions
- NUnit Interview Questions and Answers
- Impala Interview Questions and Answers
- ETL Tutorial
- Ionic Interview Questions
- Grafana Tutorial
- What is VAPT? - A Complete Beginners Tutorial
- SnapLogic Interview Questions
- Saviynt Interview Questions
- What is PingFederate? - A Complete Beginners Tutorial
- SnapLogic Tutorial
- Grafana Interview Questions
- RHCE Interview Questions and Answers
- Web Services Interview Questions
- Domo Interview Questions and Answers
- Terraform Interview Questions
- What is Sophos? | Sophos Turorial for Beginners
- Top Servlet Interview Question And Answers
- NLP Interview Questions and Answers
- Microsoft Intune Interview Questions
- Top XML Interview Questions And Answers
- Tosca Commander
- Katalon vs Cypress
- SQLite Tutorial
- Tosca Tutorial - A Complete Guide for Beginners
- Xamarin Interview Questions and Answers
- UiPath vs Automation Anywhere - The Key Differences
- OpenShift Interview Questions
- What is Katalon Studio - Complete Tutorial Guide
- Kronos Interview Questions
- Tosca Framework
- Burp Suite Tutorial
- Mendix Interview Questions
- Power Platform Interview Questions
- Burp Suite Interview Questions
- What is Mendix
- What is Terraform ?
- Burp Suite Alternatives
- Dart vs Kotlin
- What is Kronos?
- ES6 Interview Questions
- Entity Framework Interview Questions
- COBOL Interview Questions
- Express JS Interview Questions
- OSPF Interview Questions
- LINQ Tutorial
- CSS3 Interview Questions and Answers
- Auth0 Tutorial
- MS Access Interview Questions
- What is SPARQL - A Complete Tutorial Guide
- ExpressJS Tutorial
- UML Tutorial
- HTML vs XML
- Cypress vs Jest
- Impacts of Social Media
- OWASP Interview Questions
- Security Testing Interview Questions
- OpenShift vs Docker
- ES6 Tutorial
- Spark SQL Interview Questions
- Spark SQL Tutorial
- What is OWASP?
- AppDynamics Interview Questions
- Dynatrace Interview Questions
- Rest Assured Tutorial
- New Relic Interview Questions
- REST API Tutorial
- Datadog Interview Questions
- Rest API Interview Questions
- Rest Assured Interview Questions
- PTC Windchill Interview Questions
- Easiest Tech Skills To Learn
- Python SQLite Tutorial - How to Install SQLite
- Datadog Tutorial - Datadog Incident Management
- What is AppDynamics - AppDynamics Architecture
- RabbitMQ Interview Questions And Answers
- What is Dynatrace
- Datadog Vs Splunk
- Web Developer Job Description
- JP Morgan Interview Questions
- Types of Corporate Training
- Benefits of Corporate Training
- What is Corporate Restructuring?
- Blended Learning in Corporate Training
- What is Corporate Level Strategy?
- Flutter Projects and Use Cases
- How to Become a Web Developer
- How To Install Keras?
- How to Install Flutter on Windows?
- How to Install Cypress on Windows?
- How to Become a Computer Scientist?
- How to Install Katalon Studio in Windows
- How to Become a Programmer
- OWASP Projects and Use Cases
- How to Install Sophos?
- Workato Tutorial
- Workato Tutorial - What is Workato?
For the uninformed ones, Dart is an open-source, general-purpose programming language that comes from the biggest search engine across the world - Google. Dart supports the development of applications in both the server and the client side.
However, it is extensively being used to develop iOS as well as Android apps today along with Internet of Things (IoT) and web applications. In this Dart Tutorial, let’s find out everything possible about this language.
| Dart Tutorial - Table of Content |
What is Dart?
As mentioned above, Dart is an open-source programming language that was developed by Google. It is designed for both the user side and the server side. The Dart SDK comes along with a compiler, the Dart VM, as well as a utility, dart2js, which is aimed at generating Dart scripts that are equal to Javascript.
The purpose behind generating such scripts is to run them on even websites that don’t support Dart. Having said that, being somewhat similar to Java programming, Dart is an object-oriented language. It is extensively used to create web applications and single-page websites. The best example of Dart is Gmail.
| If you want to enrich your career and become a professional in Dart, then enroll in "Dart Online Training". This course will help you to achieve excellence in this domain. |
Dart SDK Installation
Jotted down below are some easy steps for Dart SDK installation:
- From the Dart SDK archive, download Dart SDK; you can choose the operating system accordingly
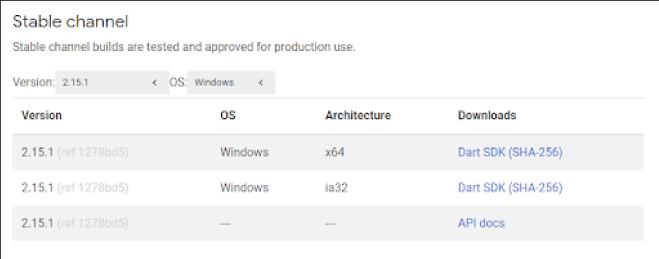
- Once you have clicked on the download option, the process will begin and a zip file will be downloaded
- The next step will be to extract the zip file
- Next, open the bin folder and type in “cmd”
- The command prompt will open up where you will have to type “dart”
- You can now use Dart from the bin folder
However, if you want to run Dart from anywhere, you will have to run it in the file system with the help of a command prompt.
- From advanced system settings, open environment variables
- Add “Path” in the system variable
Now, you can use Dart from anywhere in your file system.
- Use cmd to run Dart

Dart Development
You can trigger the Dart execution from the command line. To write and test Dart code, you can use this web user interface.
To develop as well as run a Dart application on your machine locally, you will need the Dart SDK along with a text editor or an IDE tool such as Visual Studio Code, Eclipse with the Dartboard plugin, and Atom.
-
Running a Dart Application
To run a Dart program, you will need a file along with a main() method. This file can be executed through this command line:
$ dart path-to-file.dart
This way, the compiler will pick up the main() method automatically and execute the same.
-
Building / Packaging for Production
If you wish to bundle an application, dart makes use of snapshots for it. It bundles all of the files in the project into a binary file that can be executed. And then, the Dart SDK can execute the file.
To create a snapshot use:
$ dart - -snapshot=<your-snapshot-name> <your-main-file>To run the created snapshot use:
$ dart <your-snapshot-name>Dart Programming
Every Dart app is available with the main method. It can be main(List<String> argos) or main() in case access to the command line arguments will be required.
void main() {
  print('Hello, World!');
}
Dart doesn’t support any keywords, like protected, private, and public. You will have to define the code,0 such as getters and setters outside of classes, functions, and variables. Dart makes use of a 2-character indentation by convention. Here are some essential language constructs available in Dart.
-
Variables
Dart is one statistical type of language. However, you can also use type interference to neglect explicit types. This means there will be a var keyword that communicates to the compiler that it must comprehend the type of the variable from the return value.
You can also manually type variables; however, it is recommended to use var in most scenarios.
var someVariable = "Hello World!";
int someOtherVariable = 1;
int _anotherVariable = 12;
By prefixing an identifier through an underscore, you can define the variable as private; thus, it cannot be changed outside the defining scope. Variables can have these modify:
- Static Variables: These can be found in the class rather than the instance.
- Final Variables: You can set these only once. Also, you cannot reassign them and they should be initialized before the constructor body begins.
- Const Variables: These are compile-time constants.
-
Classes
Dart supports object-oriented programming through the use of classes. Here is an example:
class Gerrit {
  String id;
  String userId;
  String subject;
}
Constructors are known as the instantiation of the class. Constructors having no body are valid in Dart. With this keyword, you can easily populate fields in the constructor.
class Gerrit {
  String id;
  String userId;
  String subject;
  Gerrit(this.id, this.userId, this.subject);
}
The constructor needs that a variety of parameters of type string gets passed to the constructor. By using this in the parameter list of constructors, you can assign values to instance variables. Here is the code that is equal to initialization with this keyword.
class Gerrit {

  String id;
  String userId;
  String subject;

  Gerrit(id, userId, subject) {
    this.id = id;
    this.userId = userId;
    this.subject = subject;
  }
}
If you want to define optional parameters, you can put them into {} braces.
class Gerrit {

  String id;
  String userId;
  String subject;

  Gerrit({this.id, this.userId, this.subject="default"});
}
Before the constructor body runs through an initializer list, you can initialize instance variables. You can use commas to separate initializers.
class Gerrit {
  String id;
  String userId;
  String subject;

  Gerrit.fromJson(Map<String, String> json)
      : id = json['id'],
        userId = json['userId'],
        subject = json['subject'];
}-
Class Instantiation
You can instantiate a class without or with the optional new keyword.
main() {
  var gerrit = Gerrit("1", "vogella" "Testing"); // using new is optional
  print(gerrit);
  final g2 = Gerrit("2", "vogella" "Testing");
}
If the value of the variable doesn’t change, you can use final rather than var.
If you are using optional parameters, you will have to use named parameters to tell Dart which parameter you are using.
ClassName(someVar: "Some Value");-
Getter and Setters
By default, Dart offers implicit getters and setters for all of the public instance variables. You can offer extra getter and setter or override the implicit getters and setters with two keywords, such as to get and set.
Access to instance variables will be the same, regardless of whether you are defining a setter or a getter.
import 'dart:async';

class StringCreator {
  final StreamController _controller = StreamController();

  StringCreator() {
    Timer.periodic(Duration(seconds: 5), (t) => _push());
  }

  _push() {
    _controller.sink.add("Lars");
  }
  Stream<String> get stream => _controller.stream;
}-
Inheritance and Implicit Interfaces
Every class defines an interface comprising all of the instance members of the class and of any of the interfaces that it implements.
class MySubTypeGerrit implements Gerrit {
  // more methods
}
Dart is available with single inheritance.
class FixedUserGerrit extends Gerrit {
  FixedUserGerrit(String id, String description)
      : super(id, "vogella", description);
}-
Using Factory Constructors
With the help of the factory keyword, you can define the factory method that returns specific instances. In case you give a default constructor name to the factory, you must have a named constructor. With _, you can make the named constructor internal.
class Gerrit {

  String id;
  String userId;
  String subject;
  factory Gerrit (int i) {
    // create instance of Gerrit based on the int information and return it
    return Gerrit._internal(i.toString(), "MyUser", "Topic 1");
  }

  Gerrit._internal({this.id, this.userId, this.subject="default"});
}-
Comments
In Dart, you can find three different types of comments:
// Single line comment

/*
Multi line
comment
*/

/// Documentation comments
/// These allow to reference types or variables via [square-brackets]-
Parameters
Basically, a function can have two varying-parameter types, such as optional and required. Some of the APIs - generally Flutter widget constructors - use just named parameters, even for the vital parameters.
When calling a function, you can ascertain named parameters with the help of paranName: value. Though named parameters are a sort of optional parameters, you can use @required to annotate them and indicate the vitality.
-
Strings
Dart does support multi-line strings.
main() {
  var user = 'Test Joe';
  var message = """
      $user!
      Welcome to Programming Dart!
      """;
  print(message);
}-
Lists and Maps
Dart offers native support for lists as well as maps. In addition to this, Dart also enables you to construct it directly. For instance, this is a list definition wherein every list element is a map.
final dummySnapshot = [
 {"name": "Filip", "votes": 15},
 {"name": "Justin", "votes": 1},
];-
Method Cascades
Dart supports the writing of fluent API through method cascades. You can call any of the methods after one another through . . operator.
class Test {
  void doIt(){}
  String returnIt() {return "s";}

}
main() {
  var t = Test();
  t..returnIt()..doIt();
  t..doIt()..returnIt();
}-
Null Aware Operations
In Dart, you can find support for null aware operations:
main() {
  var x = null;
  print (x ?? "Default text");

  x ??= "Hello";

  print(x?.toString());
}-
Casting in Dart
In Dart, the instance of operation is known as is.
class Foo { }

main() {
  var foo = new Foo();
  if (foo is Foo) {
    print("It is a foo");
  }
}
You can also explicitly cast through the as operator.
(emp as Person).firstName = 'Bob';-
Extension Methods
Through extension methods, you can add functionality to any of the existing libraries. For this, you would need a minimum of Dart 2.7.0 in the pubspec.yaml.
environment:
  sdk: ">=2.7.0 <3.0.0"
To implement an extension, the syntax that you can use is:
extension <extension name> on <type> {
  (<member definition>)*
}
For instance, you can try and add a method to the String data type.
extension NumberParsing on String {
  int parseInt() {
    return int.parse(this);
  }
}

  main() {
   int i = "12".parseInt();
  }
If you want to import extensions from a file, you can use show and hide to enable or permit specific extensions.
// Defines the String extension method parseInt().
import 'string_apis.dart';

// Also defines parseInt(), but hiding NumberParsing2
// hides that extension method.
import 'string_apis_2.dart' hide NumberParsing2;
In case both the extensions have similar names, you may have to import using this prefix:
import 'string_apis_3.dart' as rad;

// Use the ParseNumbers extension from string_apis_3.dart.
print(rad.NumberParsing('42').parseInt());| Check out Dart Interview Questions and Answers that help you grab high-paying jobs |
Asynchronous Processing in Dart with Futures, Async, and Await
Asynchronous operations let the program stay responsive while performing tasks. All of the operations that have a huge potential and will run for long should be done asynchronously, such as:
- Getting data over a network
- Ready data from a file
- Writing to a database
Dart offers significant support for asynchronous programming with this structure:
* Futures * Streams * async / await-
Isolates
Dart makes use of Isolates to run threads. Each isolate comes with its own event loop and memory. Isolates can only communicate with one another by sending messages. This makes it easier for you to collect waste on an isolated basis.
-
Future
In Dart, if you wish to perform asynchronous operations, you will have to use the Future class along with await and async keywords. A future signifies the asynchronous operation’s result. A future can have two varying states, such as completed and uncompleted. Here is an example:
Future<void> printSomeThingDelayed() {
  return Future.delayed(Duration(seconds: 3), () => print('Testing futures'));
}

main() {
  printSomeThingDelayed();
  print('Another output ...');
}-
Await and Async
The await keywords let you wait for the output of an asynchronous function and work only in an async function. On the other hand, the async keyword can be used to define the function as asynchronous. For instance, you can declare the main method as async and await an asynchronous output.
Future<void> printSomeThingDelayed() {
  return Future.delayed(Duration(seconds: 3), () => print('Testing futures'));
}

main() async {
  await printSomeThingDelayed(); // blocks until the result returns
  print('Another output ...');
}-
FutureBuilder
The FutureBuilder widget lets you use a future directly and build its UI on the basis of the widget’s state.
FutureBuilder<String>(
  future: _calculation, // a previously-obtained Future<String> or null
  builder: (BuildContext context, AsyncSnapshot<String> snapshot) {
    switch (snapshot.connectionState) {
      case ConnectionState.none:
        return Text('Press button to start.');
      case ConnectionState.active:
      case ConnectionState.waiting:
        return Text('Awaiting result...');
      case ConnectionState.done:
        if (snapshot.hasError)
          return Text('Error: ${snapshot.error}');
        return Text('Result: ${snapshot.data}');
    }
    return null; // unreachable
  },
)-
Streams
Streams are meant to support reactive programming. They work the same as Future; however, rather than returning one single value, they return a series of events. The stream can be subscribed through several methods, such as onDone, onError, and listen.
| Related Article: Difference between Dart and Javascript |
Handling HTTP Requests in Dart
The package http and/or http.dart offers a seamless way to perform HTTP requests. If you wish to use it, you would need to add it to the pubspec.yaml file.
import 'package:http/http.dart' as http;

http.Response response =
    await http.get("https://jsonplaceholder.typicode.com/todos");
if (response.statusCode == 200) {
  String body = response.body;
  print(body);
}
Handling JSON Data in Flutter
The inbuilt dart package, dart:convert, offers some methods to work with JSON data. The two primary methods are:
- jsonEncode (Object object)
- jsonDecode (String source)
To deserialize a JSON String, you will use jsonDecode:
var json = '{"key": "Some Data"}';
var data = jsonDecode(json);
print(data['key']); // "Some Data"

To serialize a JSON String, you will use jsonEncode:

var data = {'key': 'Some Data'};
var json = jsonEncode(data);
print(json); // {"key": "Some Data"}
Developing a Dart Command Line Application
Let’s find out how to develop a Dart command-line application. With the code mentioned-below, you can access a REST API from Gerrit - an open-source server - and print the output to the command line.
Setup of the Project
- First, you will have to create a new folder, also known as a directory, named gerritreader
- In the new directory, create the following files:
- lib/main.dart
- lib/change.dart
- lib/fetcher.dart
- Pubspec.yaml
- Now, in pubspec.yaml, paste the below-mentioned content:
name: gerritreader
description: A Dart command line application
environment:
  sdk: '>=2.4.0 <3.0.0'

dependencies:
 http: ^0.12.0
This will make the HTTP library and Dart SDK available.
Data Model
- Inside the lib/change.dart file, which is representing a Gerrit change request, create this class:
class Change {
  String id;
  String userId;
  String subject;
  String project;
  String status;
  DateTime updated;

  Change({this.userId, this.id, this.status, this.subject, this.project, this.updated});

  @override
  String toString() {
    return "Subject " + subject + " Updated " + updated.toString();
  }

  factory Change.fromJson(Map<String, dynamic> json) {
   return Change(
      // userId: account['_account_id'],
      userId : json['owner']['_account_id'].toString(),
      id: json['change_id'],
      // more complex validation / conversion could be moved to a static method
      updated: DateTime.parse((json['updated']).substring(0, 10)),
      subject: json['subject'],
      status: json['status'],
      project: json['project'],
    );
  }
}
Fetching the Data
- Create this class in the lib/fetcher.dart file
import 'package:http/http.dart' as http;
import 'dart:convert';
import 'change.dart';

const CHANGES_URL =
    'https://git.eclipse.org/r/changes/?q=status:open+project:platform/eclipse.platform.ui';

// set to false in case you don't want the JSON printed to the command line
const DEBUG = true;

class Fetcher {
  Future<List<Change>> fetchChanges() async {
    http.Response reponse = await http.get(CHANGES_URL);
    var body = reponse.body.replaceAll(r")]}'", "");

    var changes = <Change>[];
    for (var json in jsonDecode(body)) {
      changes.add(Change.fromJson(json));
      if (DEBUG) {
        JsonEncoder encoder = new JsonEncoder.withIndent('  ');
        String prettyprint = encoder.convert(json);
        print(prettyprint);
      }
    }
    return changes;
  }
}
Using the API in the Main Method
Now, you will have to use the API that you had created:

import 'package:gerritreader/fetcher.dart';

main() async {
  Fetcher fetcher = Fetcher();
  await fetcher.fetchChanges();
}
Testing the Program
You will now have to run the program through IDE. And then, begin debugging. You can also run it through the command line in the lib folder through dart main.dart.
Conclusion
Dart is definitely a well-recognized and widely used language. Now that you would have gotten a tad bit more familiar with Dart through this tutorial, it’s time that you begin the experimentation all by yourself. Once you’ve understood this Dart tutorial, find out more aspects and factors about this language and set up the project.
 On-Job Support Service
Online Work Support for your on-job roles.

Our work-support plans provide precise options as per your project tasks. Whether you are a newbie or an experienced professional seeking assistance in completing project tasks, we are here with the following plans to meet your custom needs:
- Pay Per Hour
- Pay Per Week
- Monthly
| Name | Dates | |
|---|---|---|
| Dart Training | Jul 18 to Aug 02 | View Details |
| Dart Training | Jul 21 to Aug 05 | View Details |
| Dart Training | Jul 25 to Aug 09 | View Details |
| Dart Training | Jul 28 to Aug 12 | View Details |

Viswanath is a passionate content writer of Mindmajix. He has expertise in Trending Domains like Data Science, Artificial Intelligence, Machine Learning, Blockchain, etc. His articles help the learners to get insights about the Domain. You can reach him on Linkedin


